Movable zine, part 3

The last two posts (part 1 and part 2) have been about my attempts at making a short run of pop-up zines cut by machines and assembled by hand.
So far I've been working mostly on the mechanical aspects of designing, cutting and assembling the pieces, but I haven't added many graphic elements. This month I decided to learn more about that part of the process.
Print then cut:
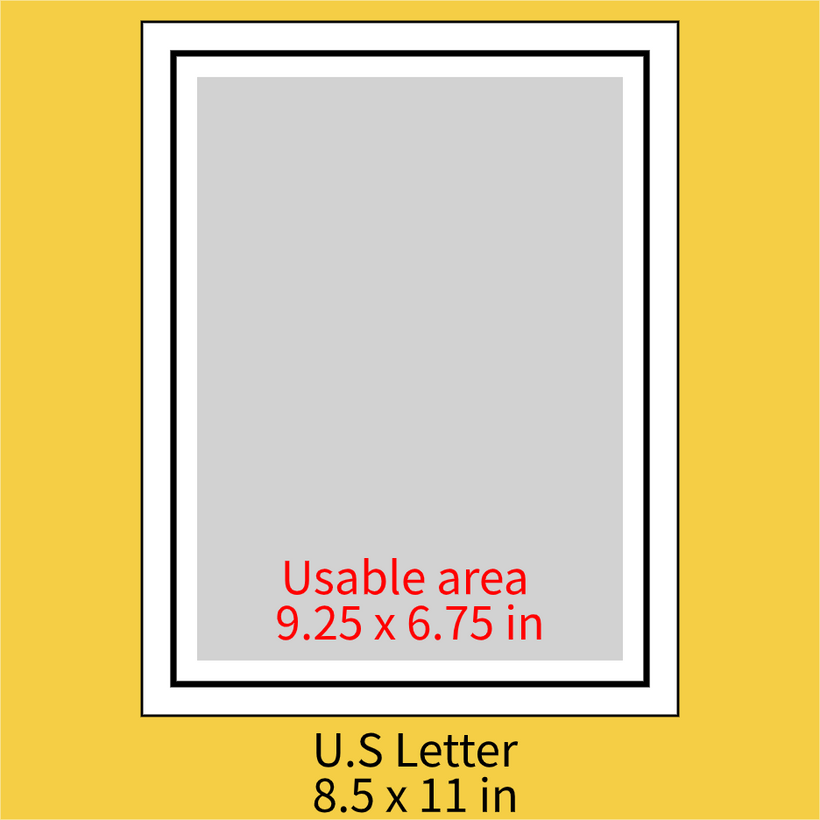
Since I'm using a Cricut machine I started experimenting with their "Print then cut" system. It works by uploading your images and cut paths into the Cricut software, called "Design Space", and after assigning the operations you want to perform, such as cutting or scoring, Design Space provides you a file you can print and then load into the machine.
The file adds a thick black rectangle around your design that the machine uses to align the operations with its optical sensor.
There are two downsides to this system:
You are currently limited to U.S Letter size paper (8.5 x 11inches)
The usable area is reduced by the rectangle to 9.25 x 6.75 inches
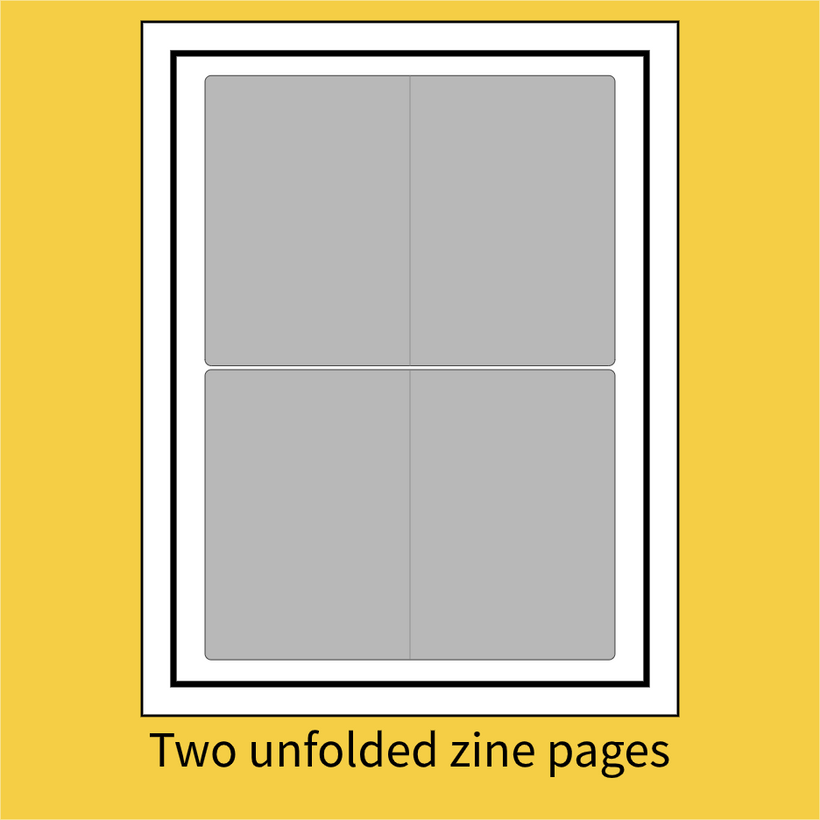
This means I had to adjust the size of my unfolded pages to 6.5 x 4.6 inches (the ratio is approximately 1:√2) so I can fit two in a single Letter sheet like so:
Because this adjustment I also decided to ditch the binding system I tried before for something more conventional. More details about that below.
Tests with dummy shapes:
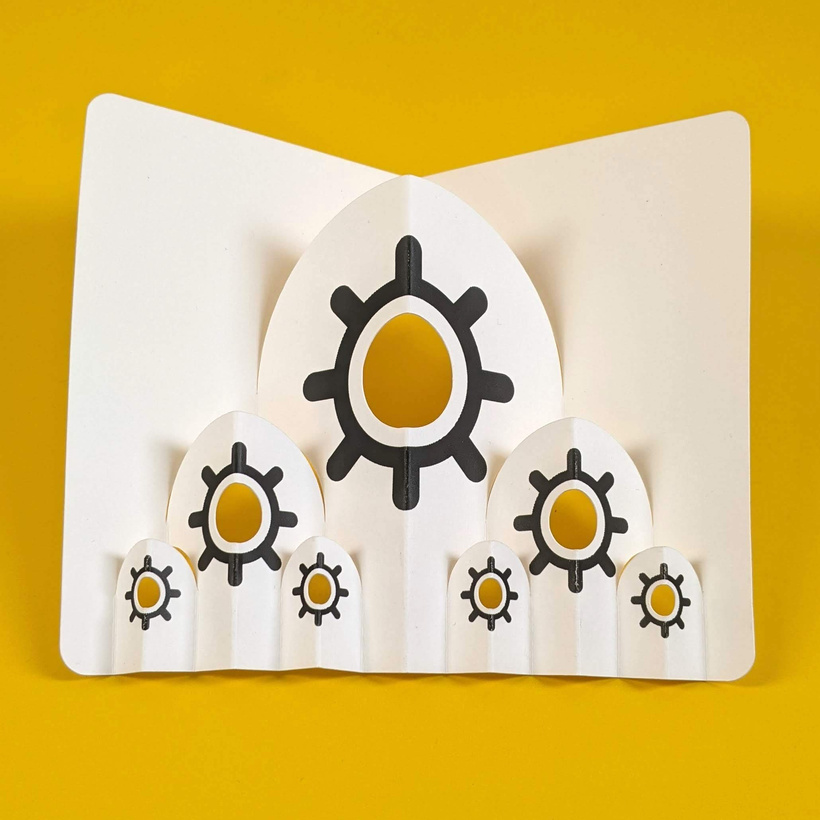
After figuring out all these dimensions I wanted to test the workflow so I designed some pop-ups and drew some simple shapes to be printed, and then cut. I'm calling them dummy shapes because this isn't the kind artwork I'm aiming for in the final product. At this stage I wanted to pay more attention to the technical process than to the art so I doodled something quickly.
I started with some one piece pop-ups where the whole mechanism is cut out of a single sheet.
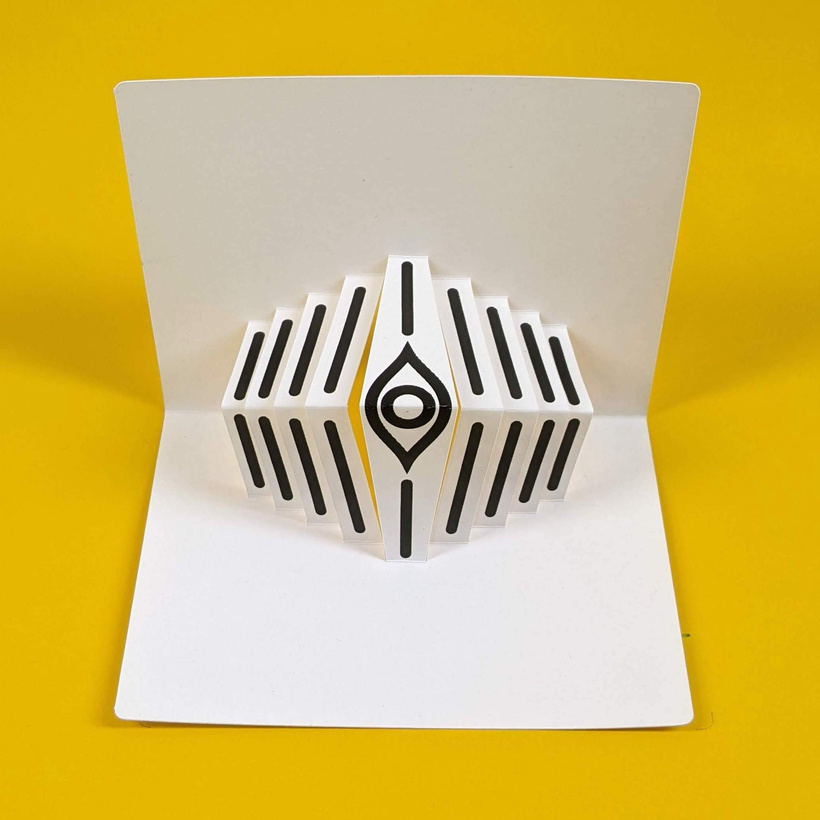
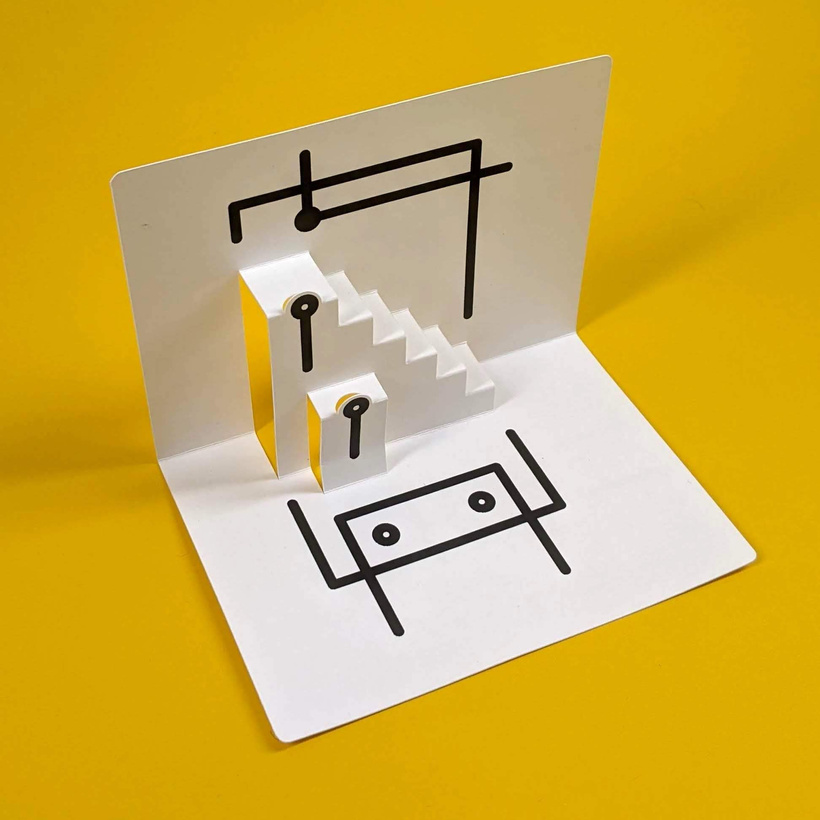
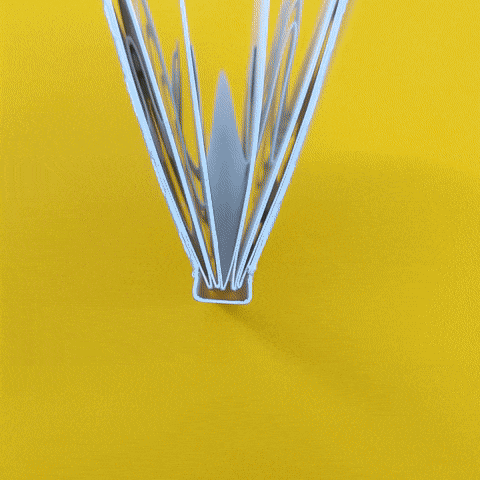
And things worked out well so I went for some multi-piece mechanisms that required further assembly, like this V-Fold that included some printed sections on the page and looks vaguely like a cat:
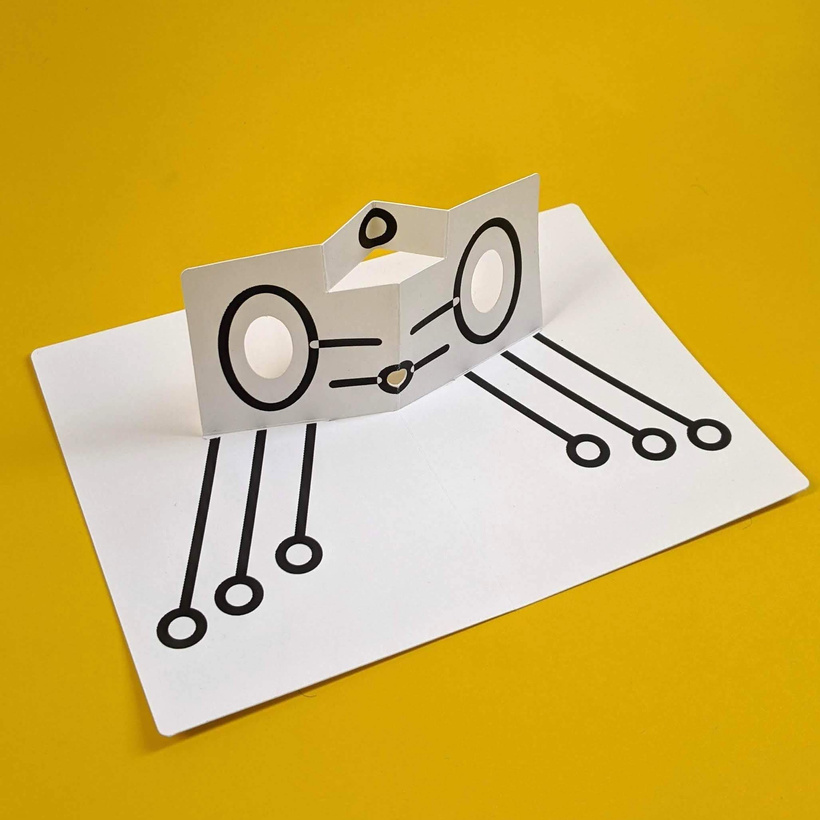
And this funny looking thing, alien space bird maybe?
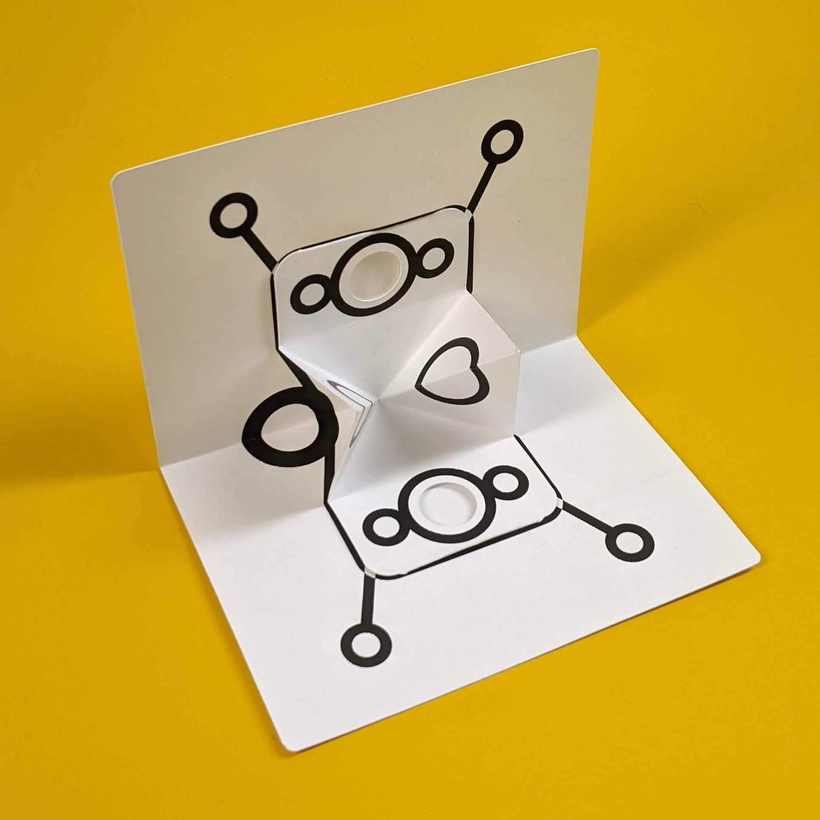
These multi-piece pop-ups tend to create a more satisfying kinetic experience:
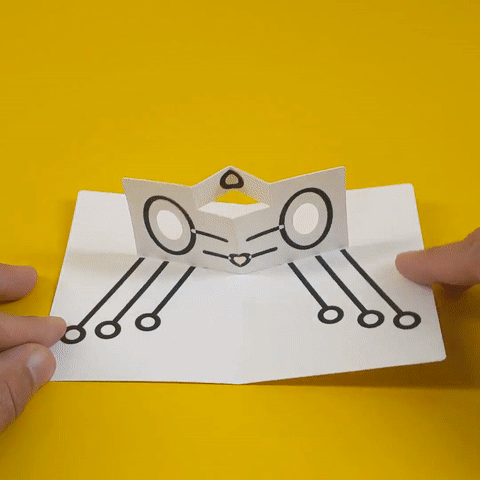
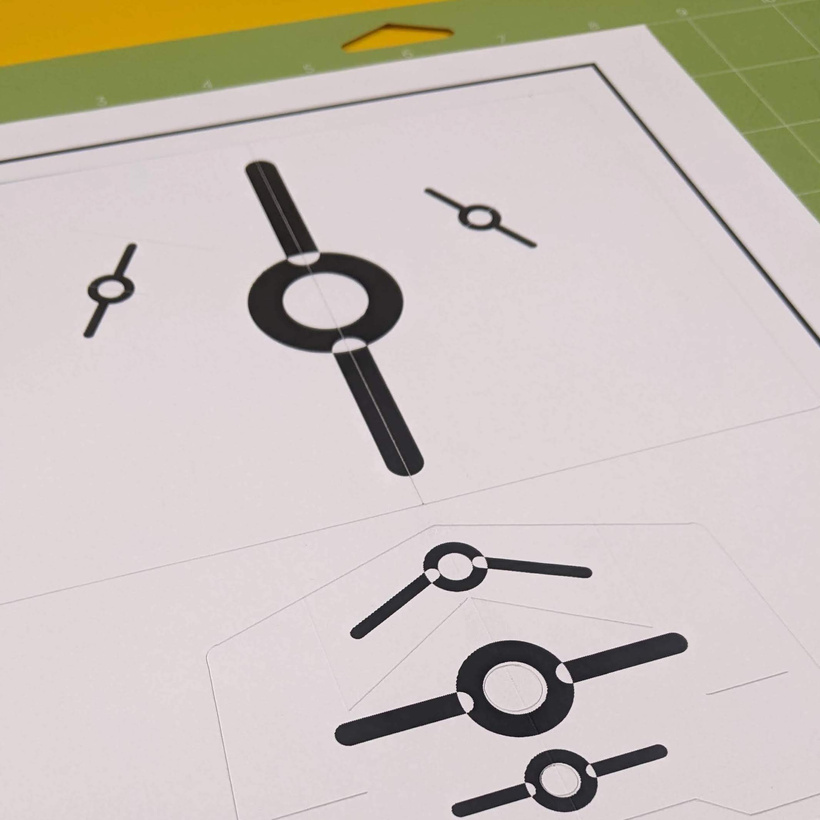
I made one test that resembles the one I showed you last time as it uses the "V-Fold" and "scenery flats" techniques, but this time it has added printed visual elements. This is what it looks like on the Cricut mat after cutting and scoring (notice the black border around it, that's the optical registration rectangle):
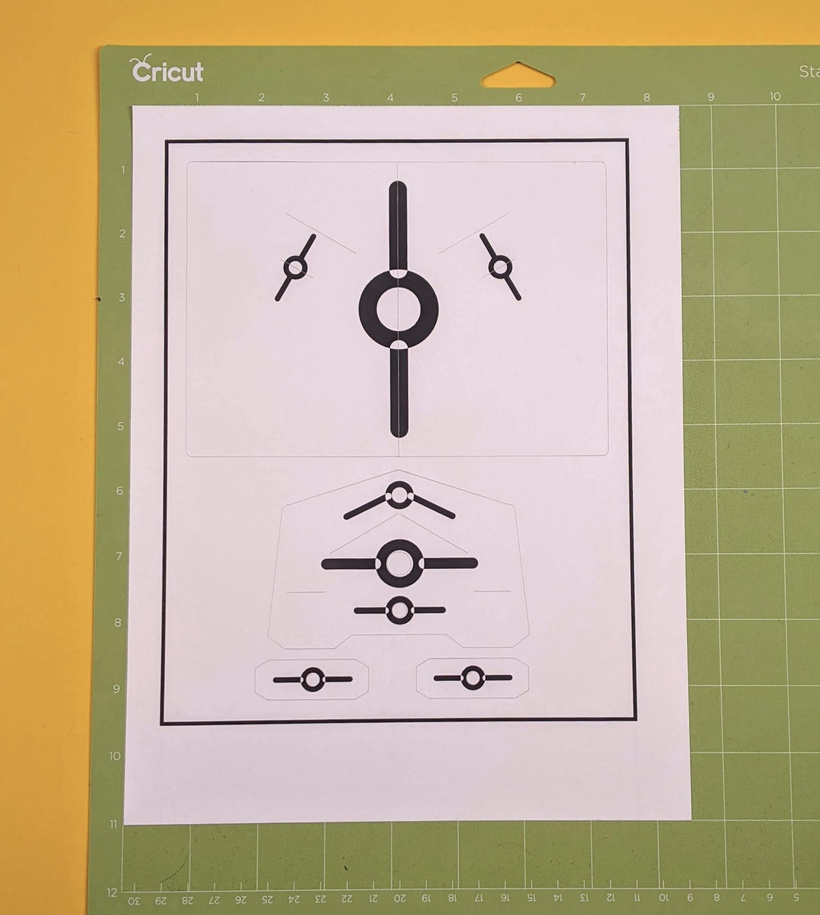
Sadly there is a bit more waste than I would like.
Here is a close-up:
And this is it in action:
Binding:
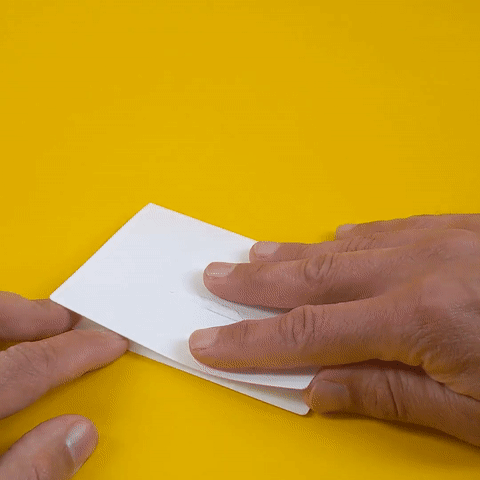
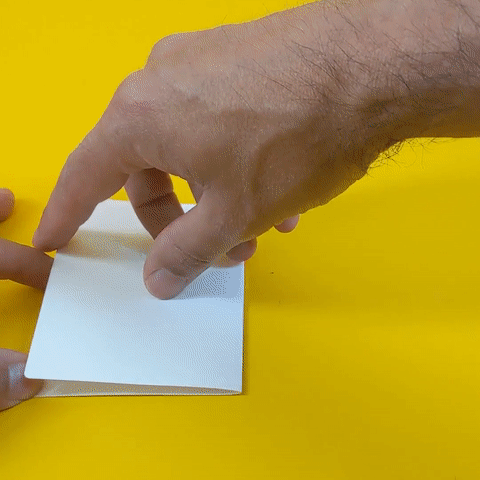
As I mentioned before decided to try a more conventional binding method and I ditched the binding posts. Every pop-up gets glued to its neighbor and at the end all of them get a cover with some allowance for movement. Assembly it's a bit more laborious but the pages of the book are easier to flip.
I fabricated a few cover prototypes to try and get the size of the spine and the hinges just right. The cover gets glued at the end to the whole booklet, but the spine needs to "float" and allow the pages to open a full 180 degrees, this is what that looks like:
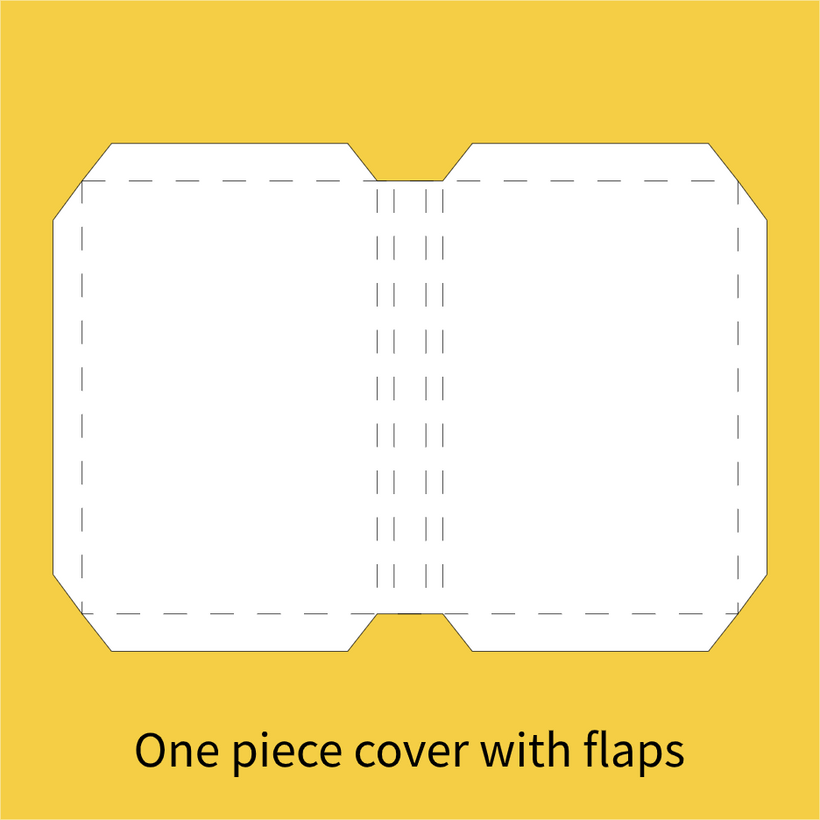
I designed the cover to be cut out of a single piece of thicker card stock (110 lb) with some flaps that get folded and glued to reinforce the edges. In traditional bookbinding there would be thick pieces of board to stiffen the covers but I'm trying to simplify things a little bit.
Instead of scoring the fold I've been using a dashed cut, which is faster to do and easier to fold on thicker card, it looks like this:
This method creates slightly rough edges but the fabrication is straight forward.
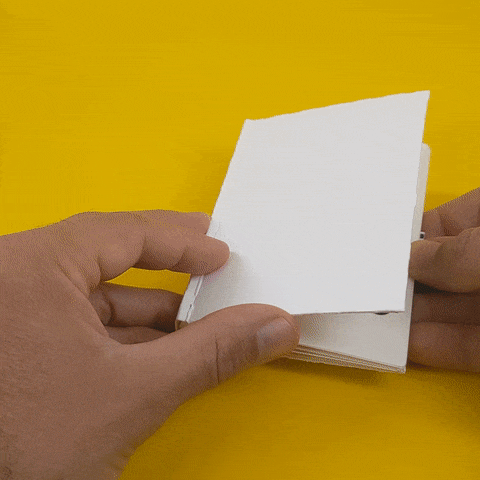
And this is a view of the bound book, it's probably the tiniest pop-up book I've ever seen!
This is the last update of 2021. I'm incredibly grateful for your support and willingness to follow along with these creative experiments, I hope you are finding them interesting.
Wishing you some happy (and safe) holidays and a happy new year from my messy paper scrap filled desk in Los Angeles. See you in 2022!
Federico :)