Movable zine, part 1
In Love letter to Plywood artist Tom Sachs calls steel the King of all building materials and plywood the Queen. I think paper deserves a higher title. Almost always before anything is built out of steel or plywood its life starts on paper or as paper, in the form of sketches or prototypes. Paper is perhaps one of the first building materials we are given as kids. Cheap, ever present, versatile.
I gained a lot of admiration for paper when I did that series of tiny machines a few years ago. As a mechanical element paper can do multiple things with minimal manipulation: it can be a structural element actings as a membrane, or as a member in tension or in compression, it can act as a spring, and it can form linkages. It's also very good as a decorative element as it comes in many colors and textures and can be shaped in many ways.
I didn't sell any of those pieces although lots of people asked me because I felt they were too fragile. Most were one-offs and improvised in less than a day, and the paper I used probably wasn't the best quality. I went briefly on a search for alternative, more durable materials, and that lead me to the 3D printing on polyester experiments. Although I still want to experiment with fabric for that type of piece I keep coming back to paper.
Something I've wanted to try for a while is making short runs of pop-up zines and just recently the right tools have appeared in my life thanks to some of you and I've been exploring the possibilities. I think these interests of mine in mechanical things and illustration can come together in the form of pop-ups.
Tools and materials
I've been using a Cricut Maker which is capable of scoring the paper and cutting it with some tool changing in between. It's nice because you can create repeatable designs and it's more affordable than the custom dies commercial productions use. I think it's possible to make short run editions with this thing.
Software wise I've been using cuttle.xyz because I can create parametric designs and I allows me to quickly make variations and try different ideas (some examples below). I haven't found many examples of this approach which is why I think it's worth talking about it.
I recently attended a virtual talk by Kelli Anderson who makes beautiful pop-up books and other visual work and I found out that pop-up artists/engineers use Neenah brand Classic Crest Cover Stock so I've been working with that in 80 lb (thickness) and some other generic color card stock.
I'm really digging these glue pens for precisely applying fast drying glue into tiny spaces.
Inspiration
I'm a big fan of most Paul Jackson Books and the two I've consulted the most are The Pop-Up book and Cut and Fold techniques for Pop-Up Designs. Followed by these books by other authors The Elements of Pop-Up and The Art of Paper Folding for Pop-Up. These last two are great because they have actual Pop-Up elements to touch and see, here is a video flip through of The Elements if you are curious.
Process
I know a lot of pop-up artists start designing things by hand but so far these experiments have been designed on the computer as I'm getting used to the workflow. I'm sure I'll add some more hand-drawn elements as I go along.
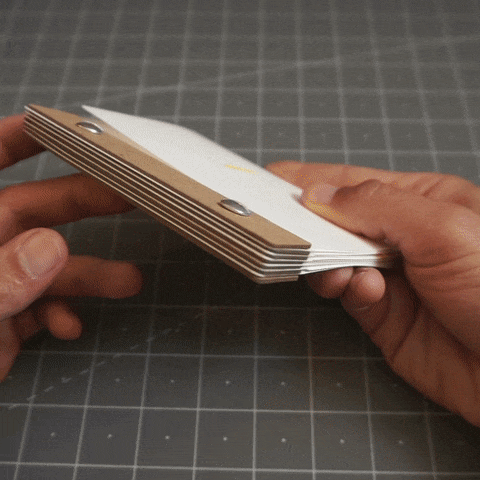
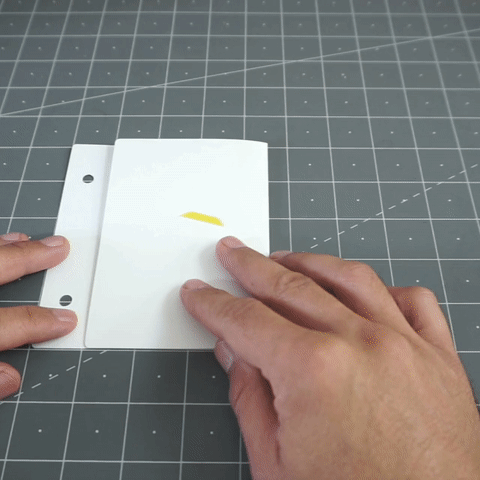
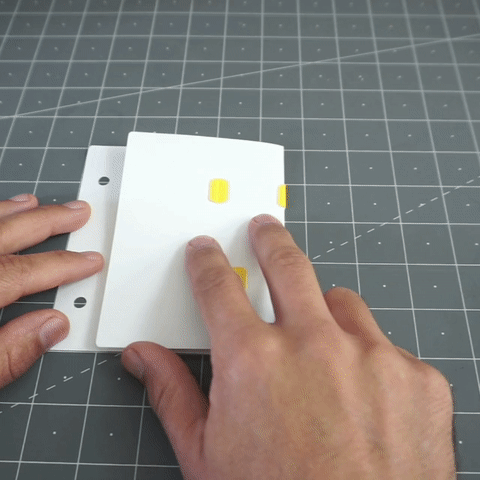
When I started experimenting I realized my desk was filling up a pile of examples so I decided to use a standard size with a way to bind them for storage and future reference. I copied the unusual binding style of one book I mentioned above The Art of Paper Folding for Pop-Up by Miyuki Yoshida . The main fold (or gutter) is on the right hand side of the book, and the left is held together with binding posts also known as Chicago screws or (believe it or not) sex bolts ¯\_(ツ)_/¯. There are chipboard spacers between the pages. It's a little different but it's simple and holds the pages closed quite well:
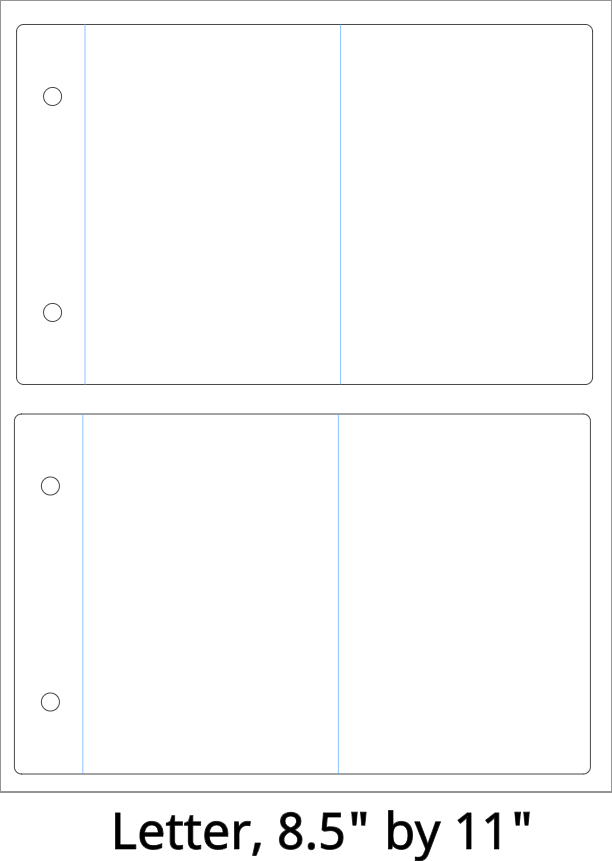
I can get two of my pages out of a letter size piece of paper with a little room for error like so:
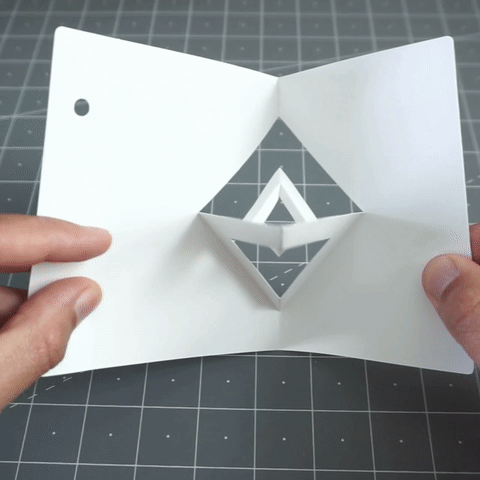
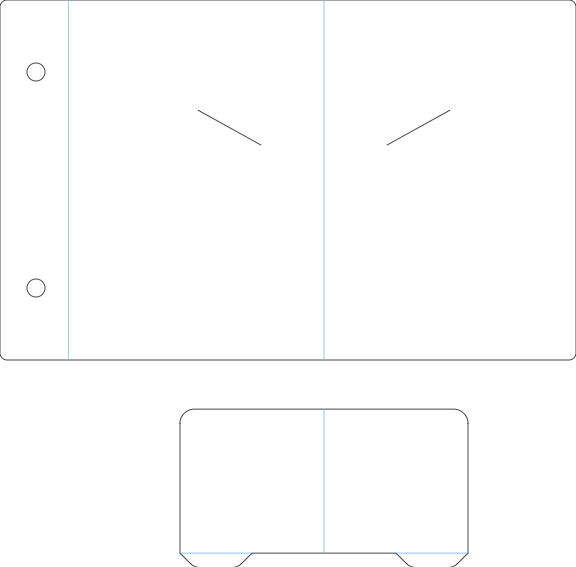
I started experimenting with the most basic of pop-ups which is the V-Fold, on screen it looks like this (blue lines are score lines):
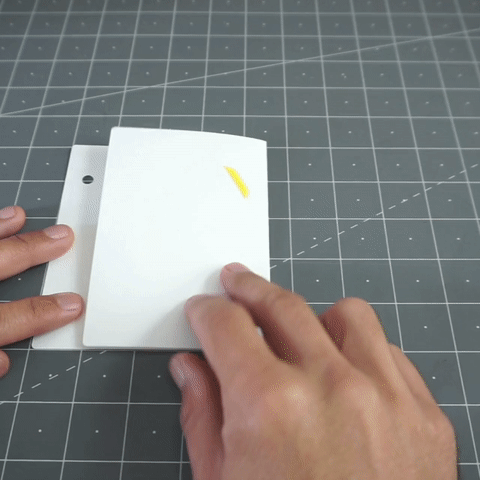
And this is the assembled version:
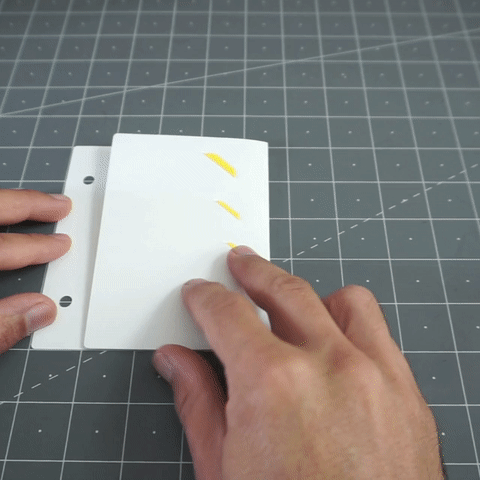
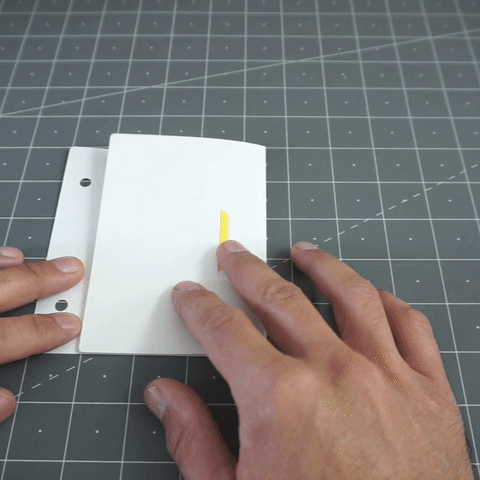
From here I could quickly jump to something more impressive by simply repeating the same thing and adding a hole:
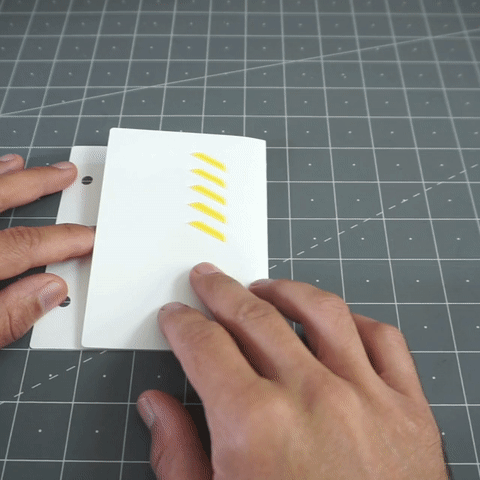
Notice that I'm also using tabs and slits for assembly, this also makes the process much faster.
The next variation was the slanted V-Fold:
Next, Instead of just repeating it I also scaled the iterations of the design here is the flat on-screen version:
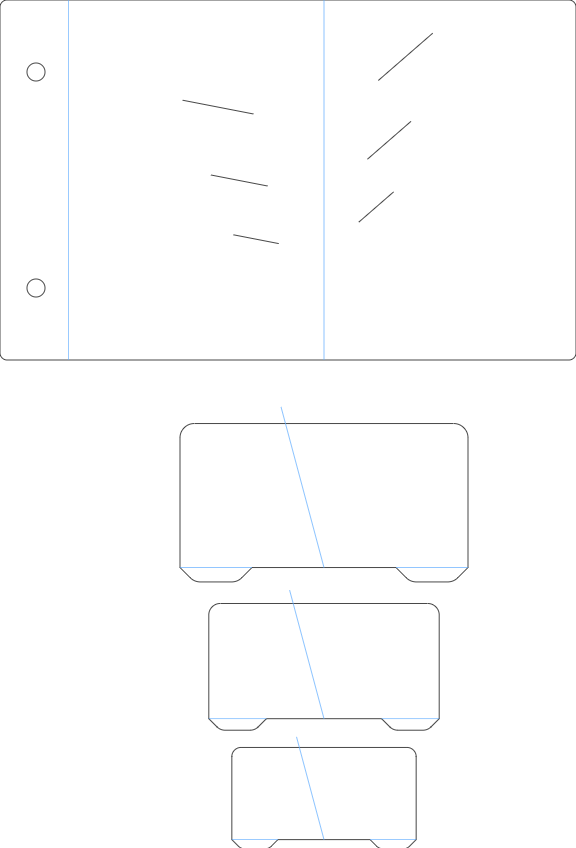
And the paper one:
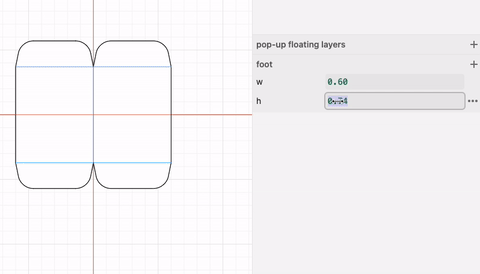
I feel like half of the work is figuring out your digital file and from then on things can be more playful and experimental. I'll confess that sometimes I start by making a sketch that just works, cutting a version, fixing the flaws or misunderstandings, and then moving on to a more elaborate file where I can change the parameters at will. This box has reached that nice advanced stage were I can vary the width and the height and things scale accordingly:
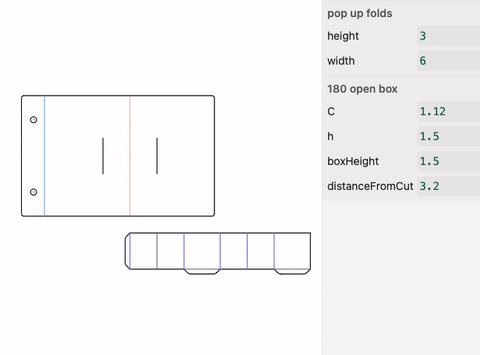
These "floating layers" also benefit greatly from this technique as I can easily vary the width and height of the standoffs (or "feet") and cut multiples as I need them.
Of course there is always assembly, I don't have a machine for that yet but luckily it is something I really enjoy :)
Next steps:
As you can see this is mostly work in progress and there is a list of things I'd like to work on next, including figuring out some better locking tabs designs to make the assembly easier and more sturdy. I also need to confront the challenges of printing images and then cutting on the right spots, I've already tried a few things but I can tell you aligning these two operations is not an easy feat, there may be compromises I have to live with but I still want to add stronger graphic elements to these things. These might come in the form of paper cut outs or printed elements.
I like the current style of binding but I'd like to design some nice covers. I might also experiment with heavier card stock for the main pages, with some of these designs it bends more than I'd like.
This is just a general overview of the process, and not a tutorial, but if you are particularly curious about anything please let me know. I'd be happy to provide access to the projects and files with more documentation if you want to experiment yourself.
As always thank you so much! I feel quite lucky to be able to go in all these different directions with your support :)
Federico