Weight powered mechanism, take 2
As I mentioned on my previous post I was unhappy with the performance of my previous mechanism. It was jamming a lot because the laser cut gears weren't perfectly straight and the axles were simple wooden dowels resting on wooden holes.
For this second build I took a different approach: I splurged on some metal axles and ball bearings to make the motion and connections smoother, and I 3D printed a bunch of parts including the gears.
I struggled a bit with the decision to 3D print parts for this project. 3D printing is slower, it doesn't look as good as wood (in my opinion), and I'm relatively new to it, so I'm not as proficient. But there are some upsides such as making parts that are not constrained to the plane (as with laser cutting) and well, I need an excuse to see what I can do with it and to learn some new techniques.
At the end I do think there is a certain appeal to the mix of wooden, metal and plastic parts, also the mechanism is much more reliable. Here are some things I learned in the process:
Metal parts:
Flanged bearings are wonderful. Someone recommended these in a forum I frequent and they were right. These ball bearings have lip so if you drill the right size hole on wood or any other material you an easily embed them:
These 1/2" ball bearings happen to fit perfectly in a hole drilled with a a 1/2" forstner bit like the one below:
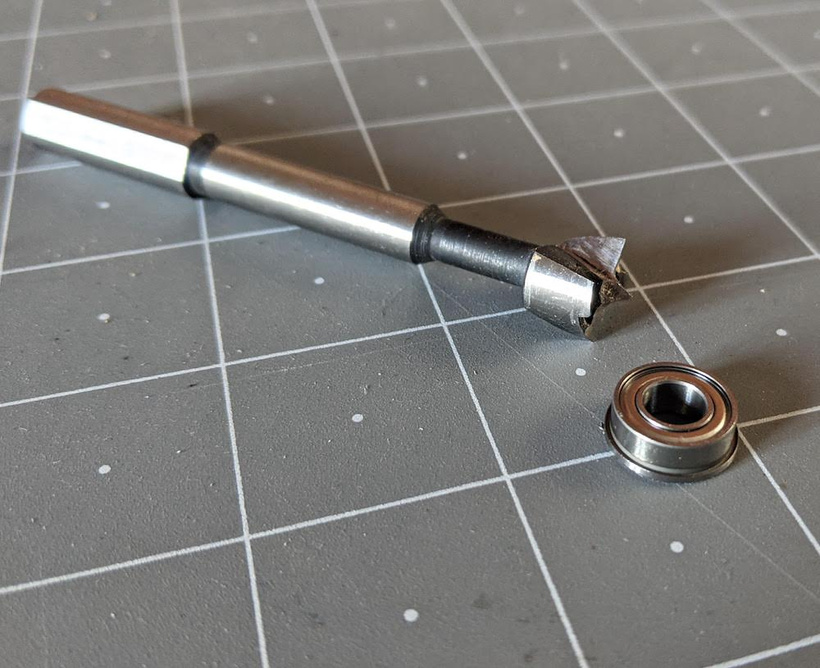
And the inside hole matches this 1/4" stainless steel D-shaft :
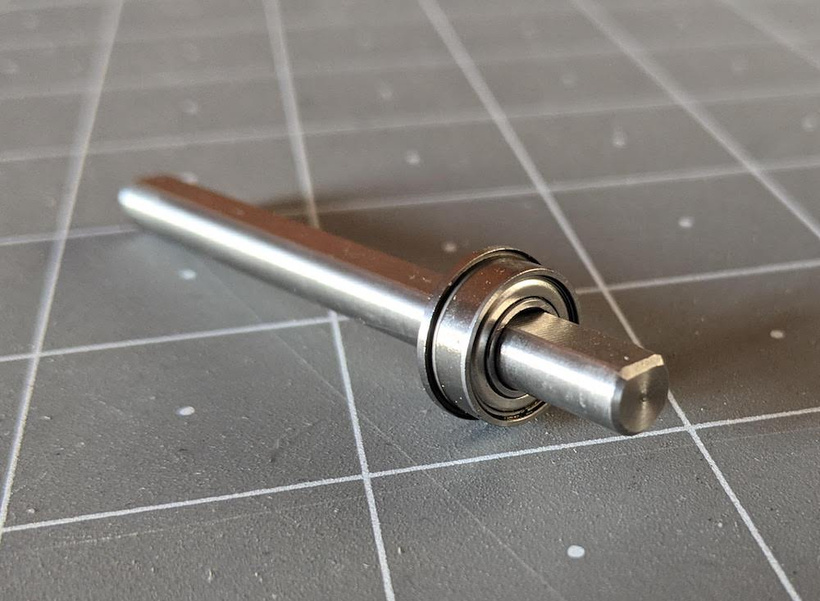
The "D" part of the shaft means that it's not perfectly round, but it has a flat side which makes for a better connection on parts like gears that are transferring rotational forces.
A bought a 10" length and cut it with a hacksaw, it wasn't too hard.
Wood parts:
Only the frame is wood this time. I used some laser-cut 1/8" MDF because it's very flat, cheap, and added some visual interest.
Plastic parts:
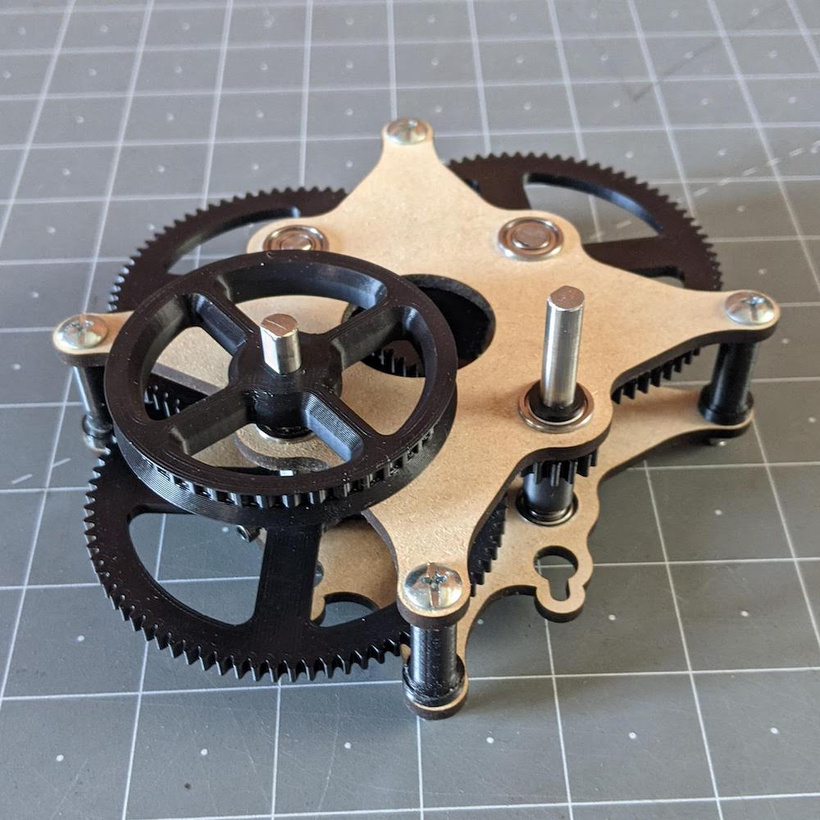
All the 3D printed parts were designed in Fusion360. The big gears have 80 teeth and the small ones 16 teeth, here is an animation with the exact configuration I used. The ratio is still 1:125 (for every rotation of the gear driven by the weight, the fly-fan governor makes 125 rotations). For the 3D printing nerds: I used ASA plastic at 0.2mm layer height on a Prusa Mini 3D printer.

Most gears are friction fit, that is, I designed and tested the hole so the shaft would fit perfectly with a little help from a mallet. I played around with making some set screws but I didn't add that feature everywhere.
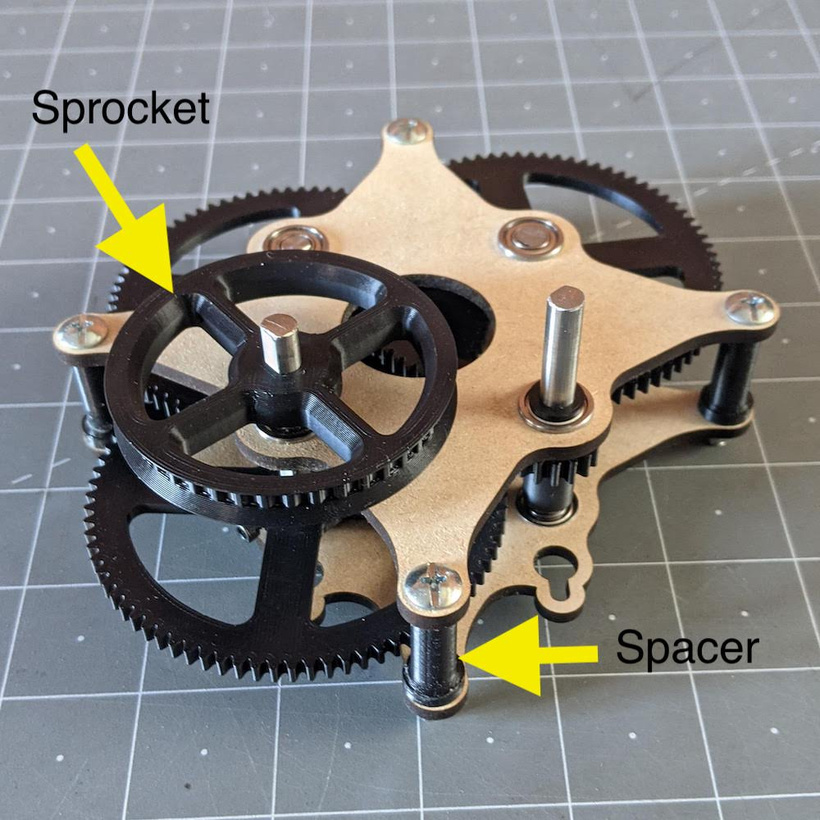
Notice that the chain sprocket is a single part. The previous version had several layers to create the channel for the chain. Also note the spacers, they are simple custom tubes but they help a lot with the alignment:
Some final thoughts:
My initial desire with this project was to create a repeatable base mechanism that I could use as a starting point for more playful or artistic kinetic sculptures. I'm not there yet, but I've learned a good number of things in the process.
It often takes a lot of trying and failing to arrive at something that works and incremental improvement can be a little frustrating at times. In a funny way 3D printing has taught me a little patience as some printing times can be pretty long (hours) and you are waiting for a part to finish so you can carry on. It's certainly faster than other things but it's a change of pace for me.
What I'd like to do next with this project is simplify some things. I think I can loose a gearing stage and still get the results I want. Also, now that I have a working model in my hands I want to make some adjustments to the spacing of the gears to make it easier to build.
I hope some of this remains interesting, I know I can veer too much into the technical side. That said, if you want more details ask me in the comments or email me, I'm happy to share numbers and files and ideas.
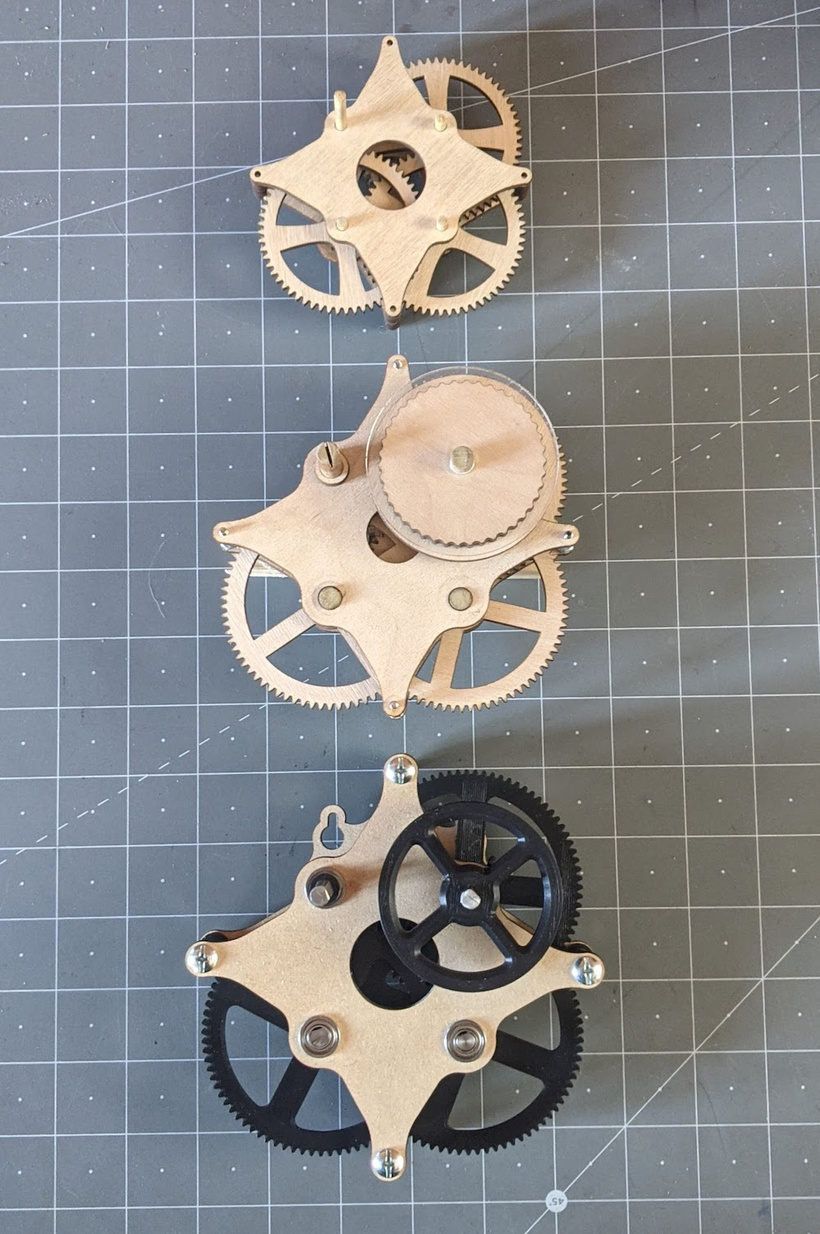
Here is a shot of the the multiple builds, sometimes it really takes more than you think:
I feel really grateful for all the support you've given me this year in helping me maintain a creative space, thank you so much! Hope your holidays are going well and I wish you the best for the new year.
See you in 2021 :)
Federico.