
Project of the month: weight powered mechanism
I've been thinking about building a weight powered automata for a while. You know, like one of those old clocks that you "wind up" by pulling a weight on a chain. I'd like to make something simpler than a clock but with the same power source. I had prototyped some mechanisms in the past but I didn't make much progress.
An important part of this kind of mechanism is a way to regulate the movement. That is, to dispense the force just a little bit at the time. Pendulum clocks use a mechanism called an escapement and that's what I tried to build before, it has a rather satisfying clicky sound that my questionable GIF won't be able to reproduce, but at least the image will give you an idea of how far I got (also, bonus cat tail in the background).
Two laser-cut parts, a weight, some lego pieces and a very messy desk. Sadly that's where I left it last time.
Then, a few weeks ago a I read an article in automata magazine (can you believe that's a thing? Yes, it exists and it's kind of awesome) written by Marc Horovitz, he built a version of a weight powered mechanism that gave me two important ideas: one, to use something called a fly-fan governor to regulate the speed, and two, use some bead-chain to transfer the power.
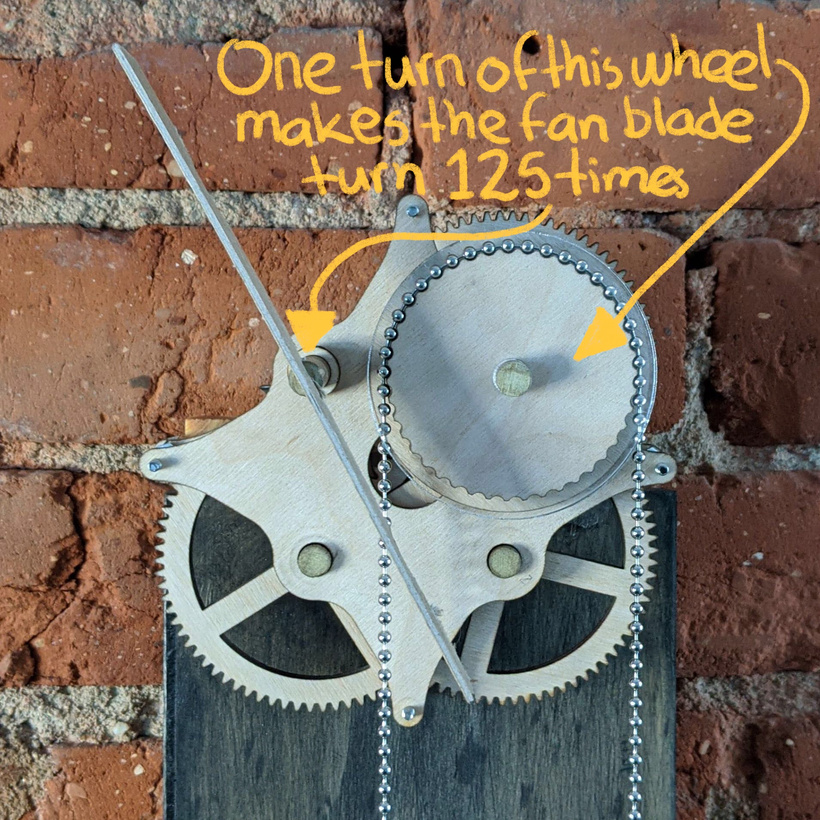
The fly-fan governor is a fancy name for the long piece of chipboard on my mechanism:
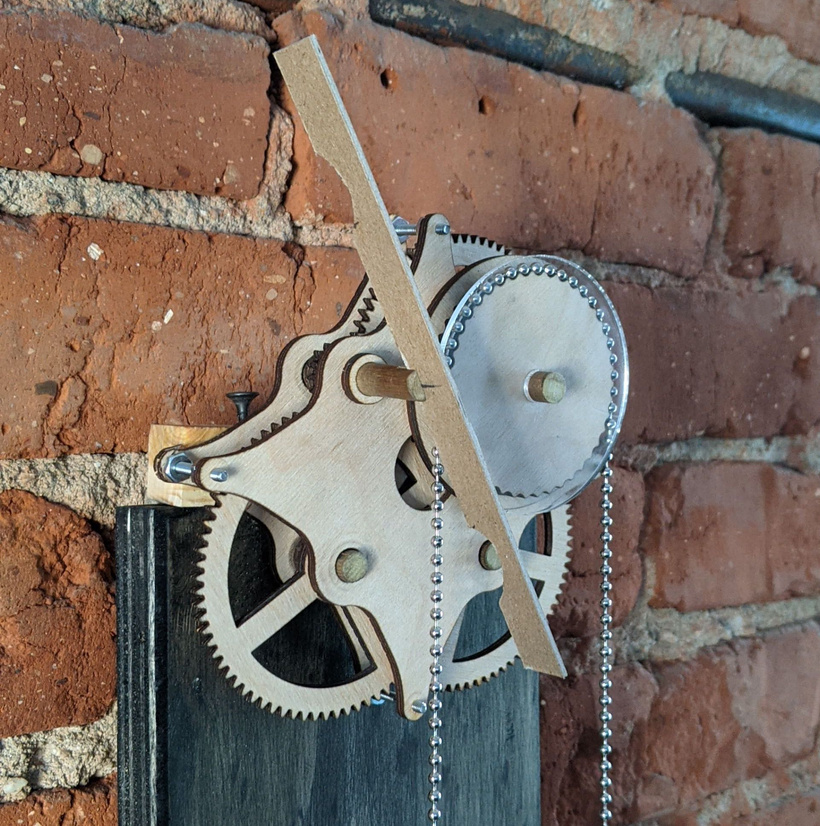
It's a "fan blade" that relies on air resistance to keep the speed down. The funny thing is that in order to make air resistance work for you, the fan blade needs to move relatively fast. And that's were the gears come in. They make it so every one rotation of the wheel with the chain makes the fan rotate 125 times, or in gear head terms a 1:125 ratio, and much faster.

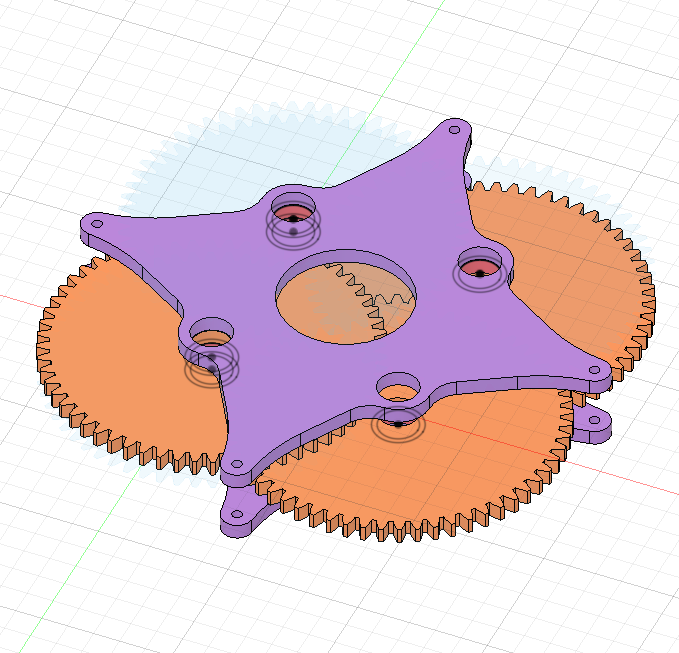
The details are a little hard to take in all at once but this animation with transparent gears might give you an intuitive understanding of what's going on.
Fly-fan governors are common in wind up music boxes and this 8 minute video is a wonderful explanation on how those work (governor is mentioned around 3:16).
Besides the fly-fan governor the other fun part of this project was figuring out how to make a sprocket to match the bead-chain. This is a cool material because it's cheap, easy to find, and makes a decent connection. I bought my section of bead chain at the hardware store. It's the same kind that's commonly used inside the toilet tanks, light fixture pull-chains and dog tags, and doing some research on it I realized it comes in an astonishing variety of sizes.
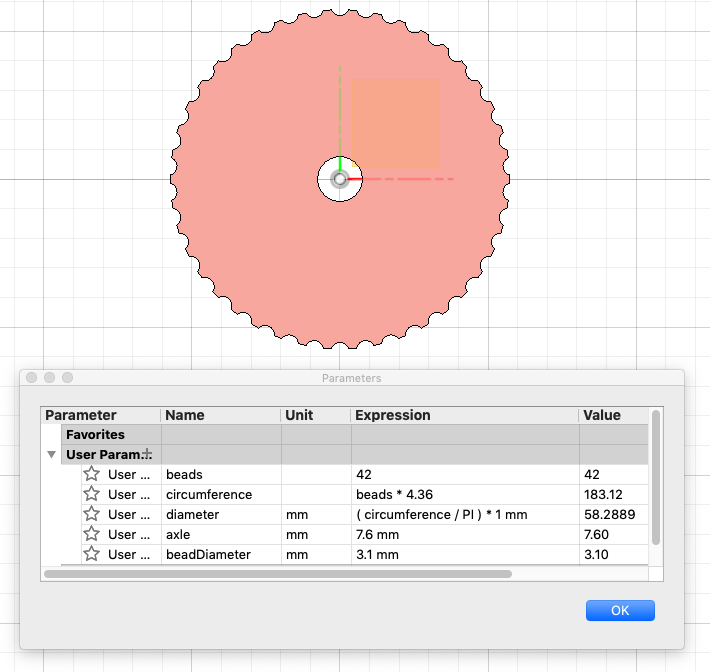
I'll write a more detailed post on making the sprocket, which is the notched wheel that accommodates the chain, but the general idea is that you need to find the distance from bead to bead and the individual bead diameter, then "wrap" that around a circle to cut the notches at the right intervals.
Measuring the distance from one individual bead to another is hard, so my approach was to measure a long section of chain, then count all the beads and find the average distance by dividing the total length by the number of beads.
After that it's a matter of doing a bit of math, this is what it looked like on the CAD software:
I designed the whole mechanism in a piece of CAD software called fusion360 and cut the flat pieces using a laser cutter, mostly out of 1/8" (3mm) birch plywood). Here is that wonderful idealized digital version:
Lessons learned and next steps:
Although I'd like to share this design it' would be cruel to give anyone the files and ask them to cut it and assemble it on their own. As much as I love plywood I ran into a lot of problems making these big gears work because they weren't perfectly flat. It' also needs a ton of little spacers and finicky calibration.
Also making the shafts out of wood dowels added a lot of wobble to the mechanism which made it jam. My first attempt had shafts made with bamboo skewers but the gears didn’t stay straight on those so I used bigger hardwood dowels for the one you see in the video but that still didn't make it as smooth as I'd like.
I think I'd like to try a version with acrylic gears and metal shafts to solve these problems. Another option would be to use a worm drive which might simplify the overall design at the cost of one difficult to fabricate part.
This project doesn't feel like a success but I'm glad I could take a few more steps in an interesting direction. I didn't get to add any storytelling or "artistic" elements to it so this is more like developing the foundation for something to come.
Thanks as always for your support and I hope this very nerdy exploration had something in it that was interesting for you.
Stay safe out there :)
Federico