
Kinetic Pieces Annotated
This month I spent a lot of time working on the commission I mentioned last time so I didn’t get to draw as much as I wanted for the handmade watercolor zine 😥
In the spirit of forgiving myself for not finishing all the things here is a public post with some notes about techniques and materials I’ve been using to make these kinetic pieces. I thought this could be interesting and potentially useful for someone.
You can also see the 1 minute assembly videos of the last 3 pieces i finished here, here and here.
Basic Goals and Materials
My goal for the last few pieces has been to focus more on wood carving and less on mechanical complexity. In a way I’ve been trying to find my voice with wood carving while improving the fabrication of the mechanical parts.
Another goal I’ve set for myself is to use less glue and more screws. This allows for future repairs but also makes the building process a little easier.
Here is a list of commonly used materials:
The main body is made out of basswood which is soft and easy to carve, I usually get it at my local Rockler. I stain the wood with diluted watercolor paints and seal it with Dorland's Wax.
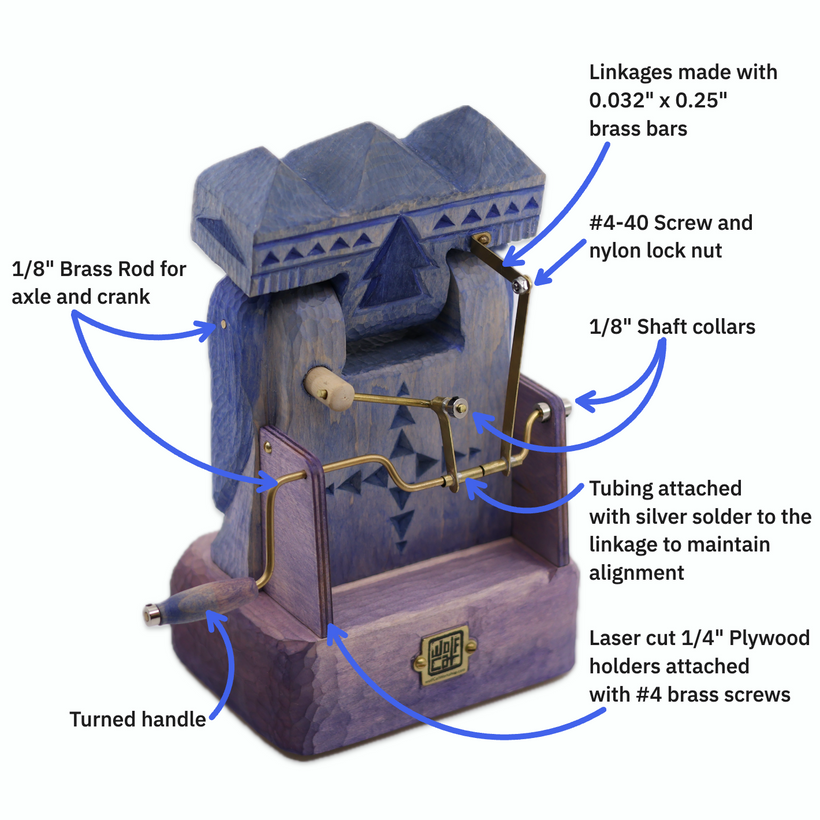
I mostly use 1/8" Brass rod (KS metals #8164) for axles and cranks, KS metals is the brand that I find at my local hardware store, often found at other art and hobby stores too.
Most wood screws are size #4.
When making connections between linkages i use #4 screws with 40 threads per inch (aka #4-40) and most importantly a matching nylon luck nut, these won't come off with the constant motion. These screws are very close in size to the more common 3mm metric screws you'll find in the rest of the world.
When soldering brass pieces i use Stay Brite lead free silver solder and flux.
For the black marking on the brass wolfCatWorkshop maker's mark i use Cermark Black Laser Engraving Spray.
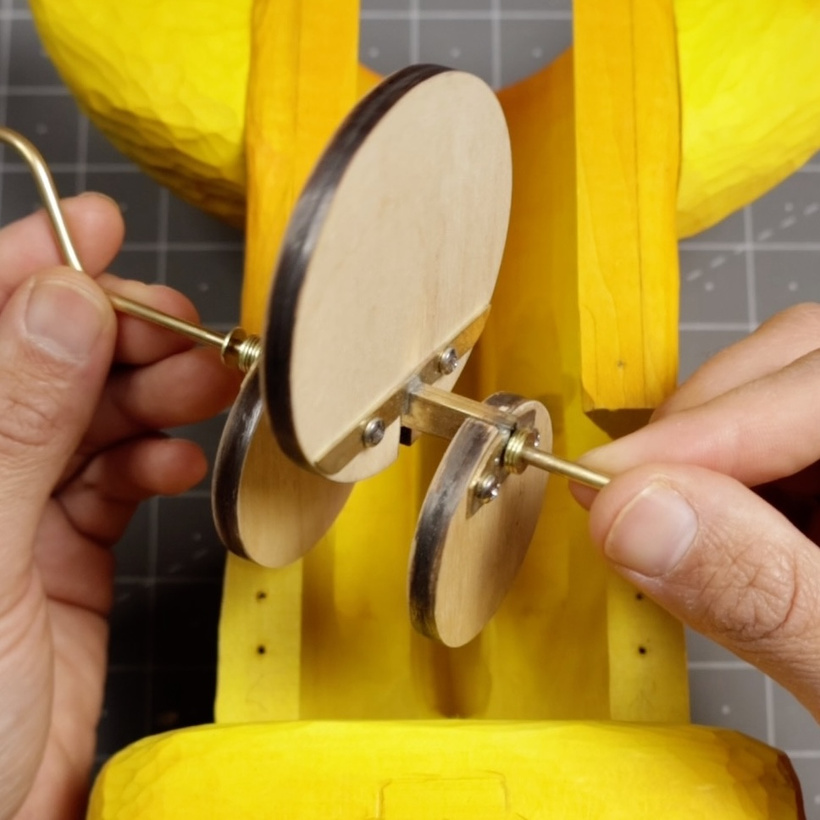
Most linkages are made with 0.032" x 1/4" brass strip (KS metals #8240)
I’ll start with a couple of older pieces to show some of the evolution in the construction.
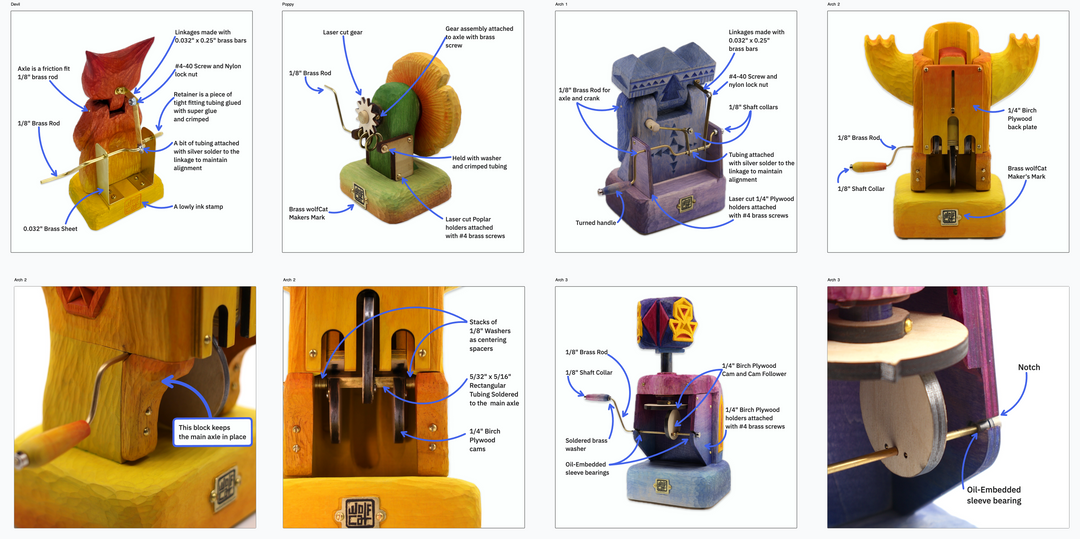
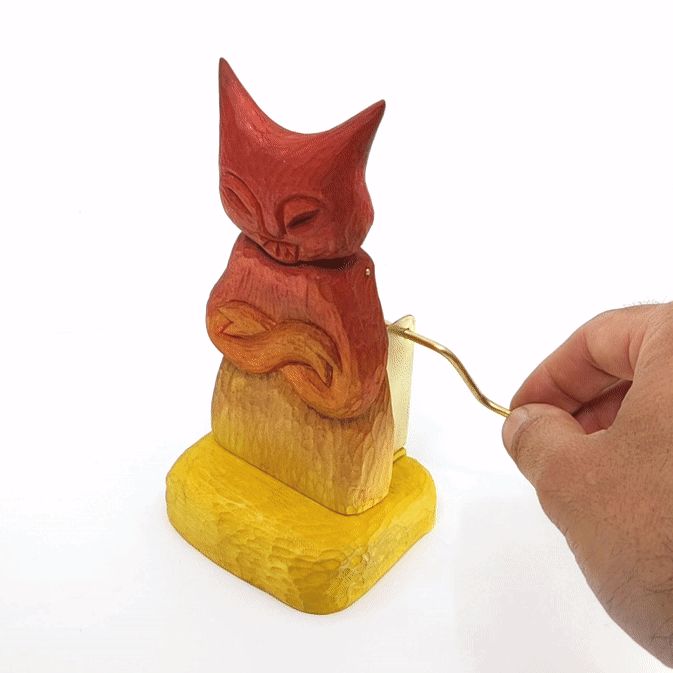
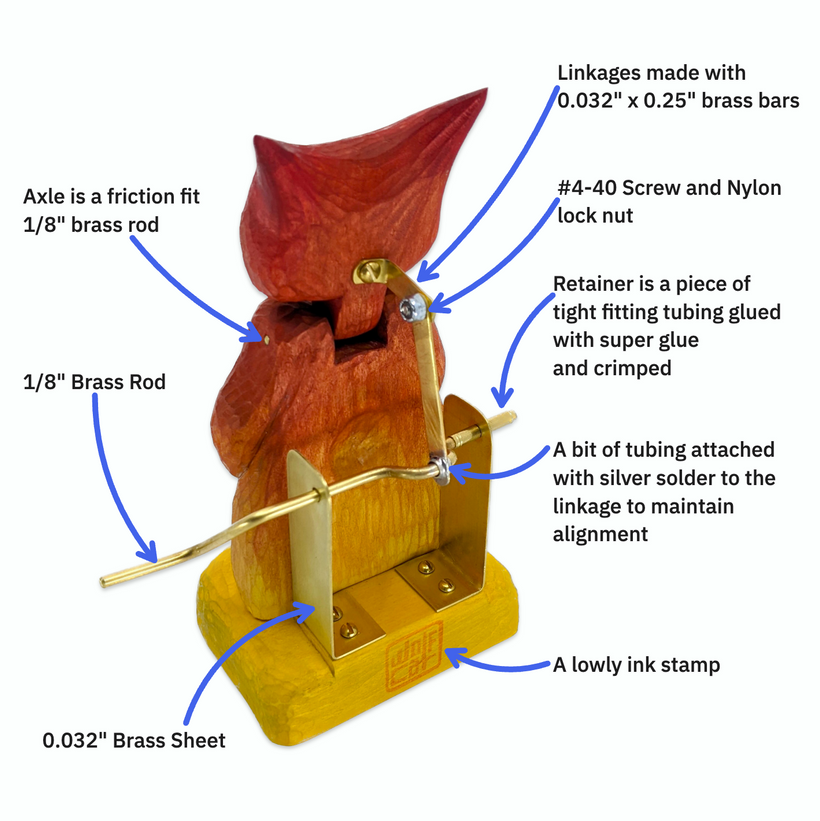
Smug Devil
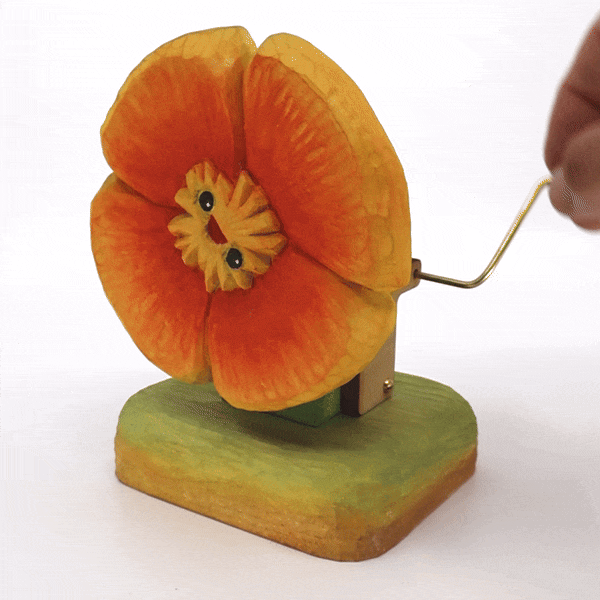
California Poppy
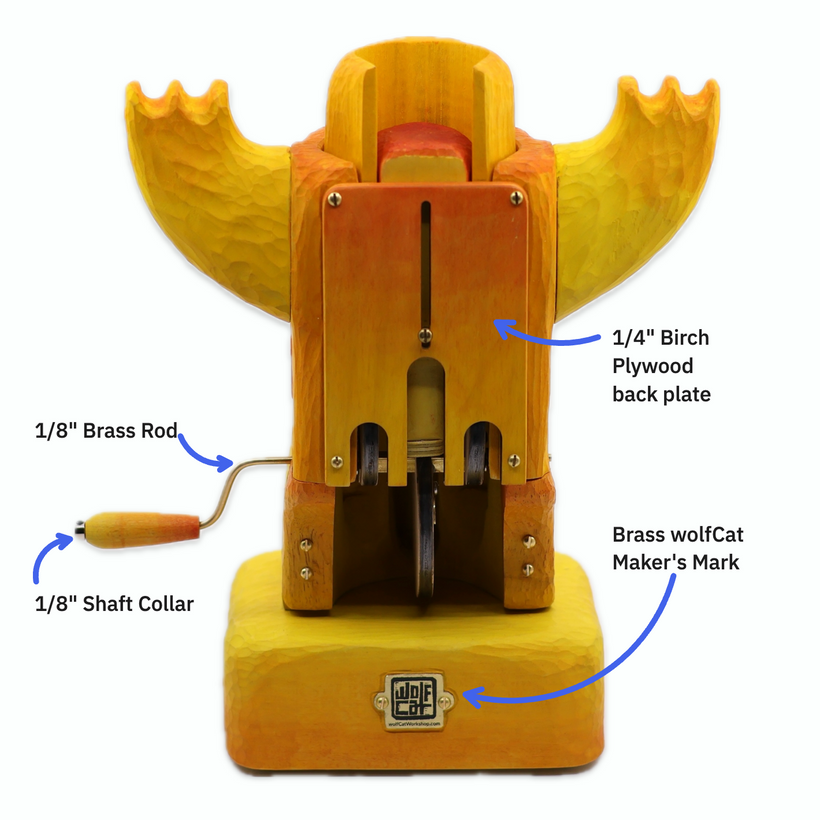
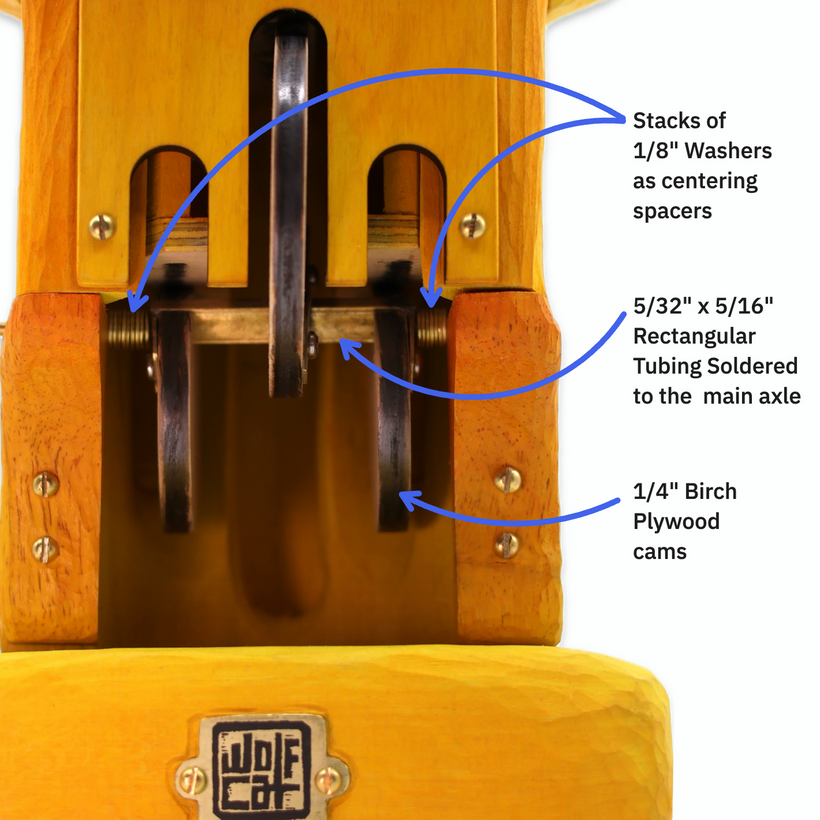
Architectural Monster #1
Assembly video here.
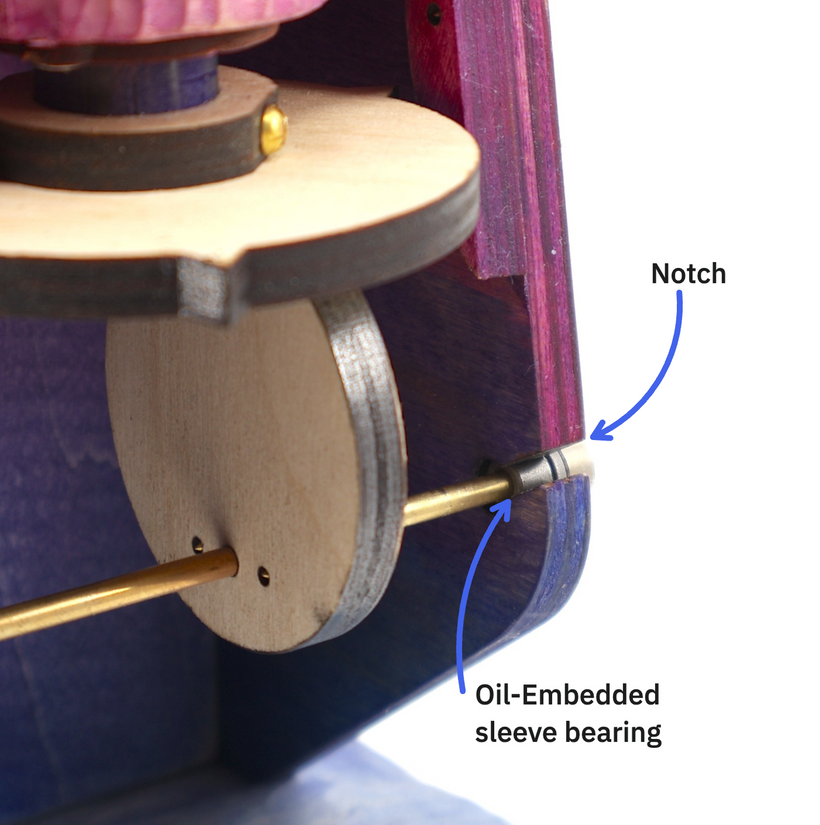
One downside is that you have to drill them out to accommodate the slightly thicker 1/8" (3.18mm) brass rod. In the assembly video you'll see me putting a little bit of thread locker fluid on the set screw to make sure it doesn't unscrew over time.
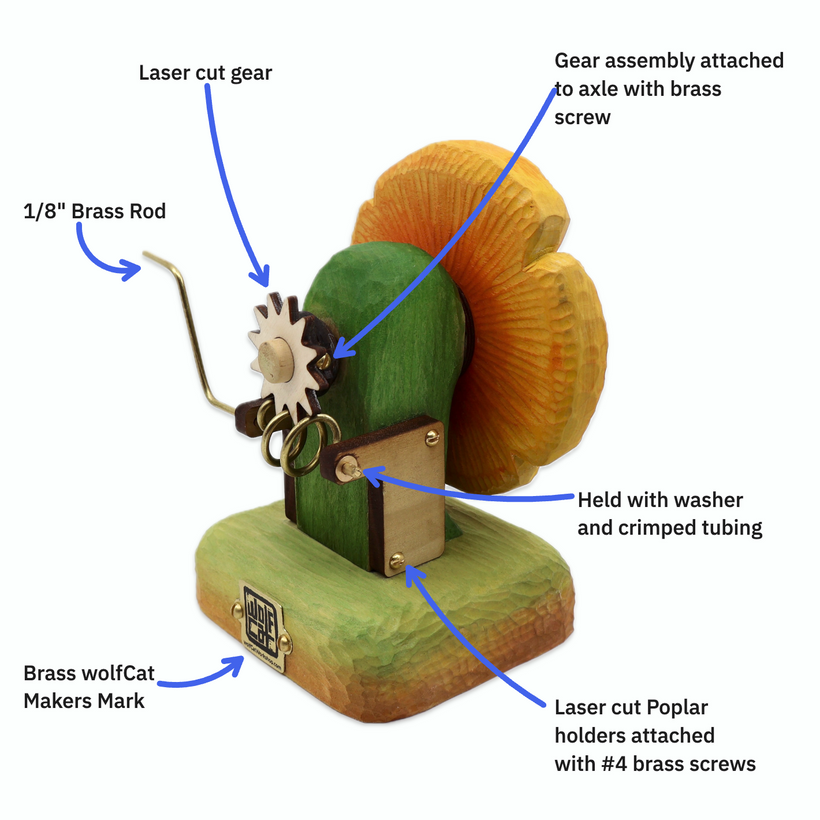
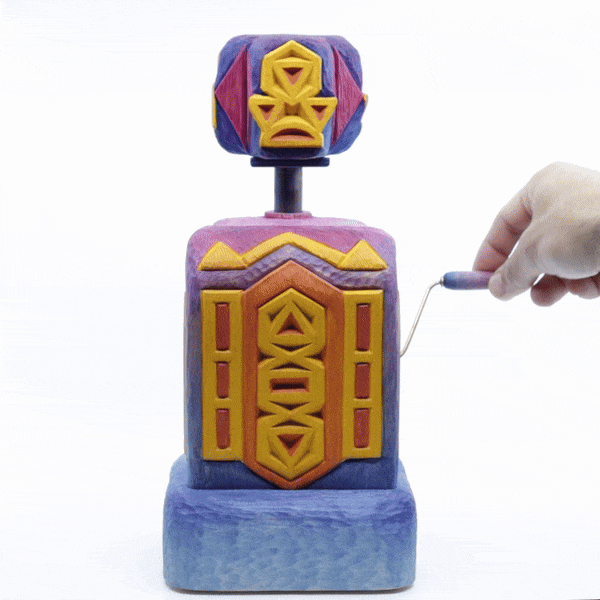
Architectural Monster #2
Assembly video here.

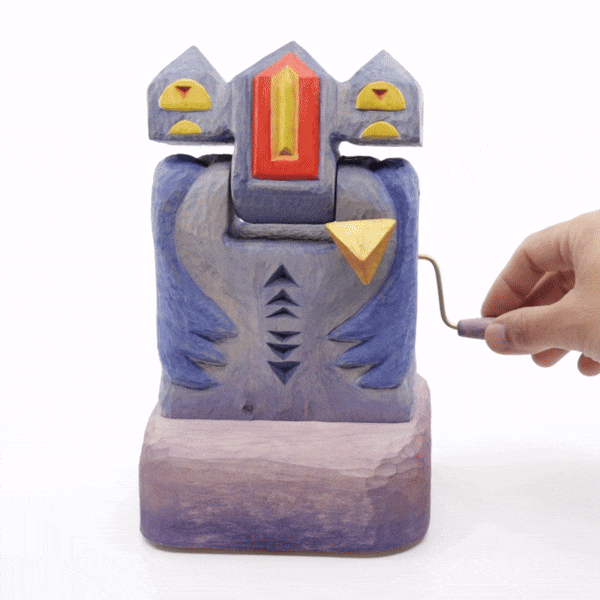
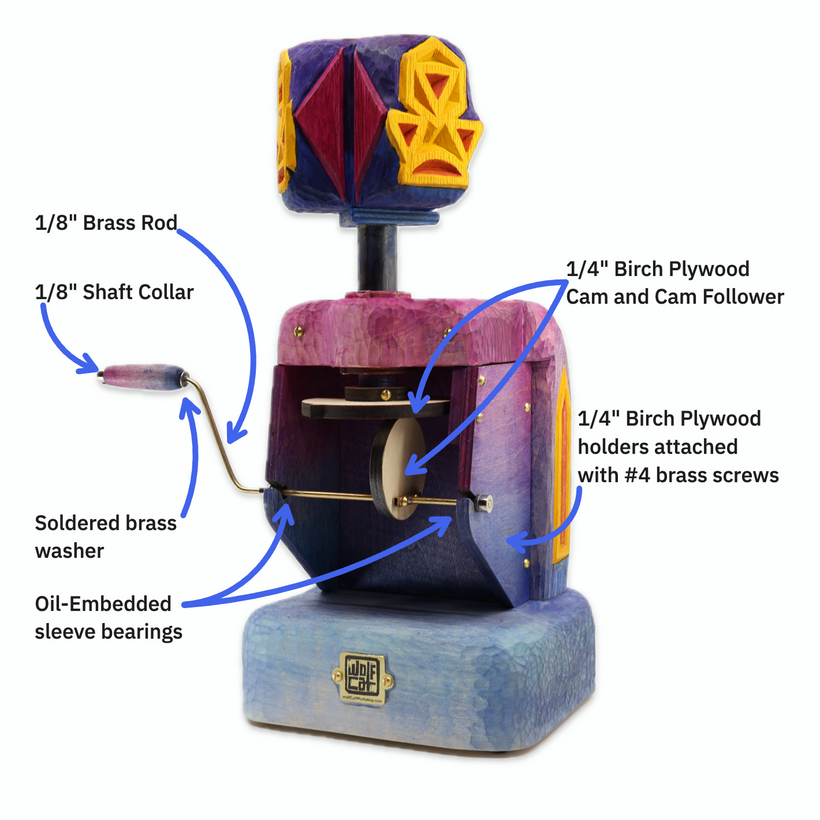
Architectural Monster #3
Assembly video here.
Final thoughts
This post feels like a bunch of public personal notes but I hope it was interesting or useful to you. I'm sure I left something out so please leave me some questions or comments.
Be well and thank you so much for reading!
Federico