Drill Powered Animation
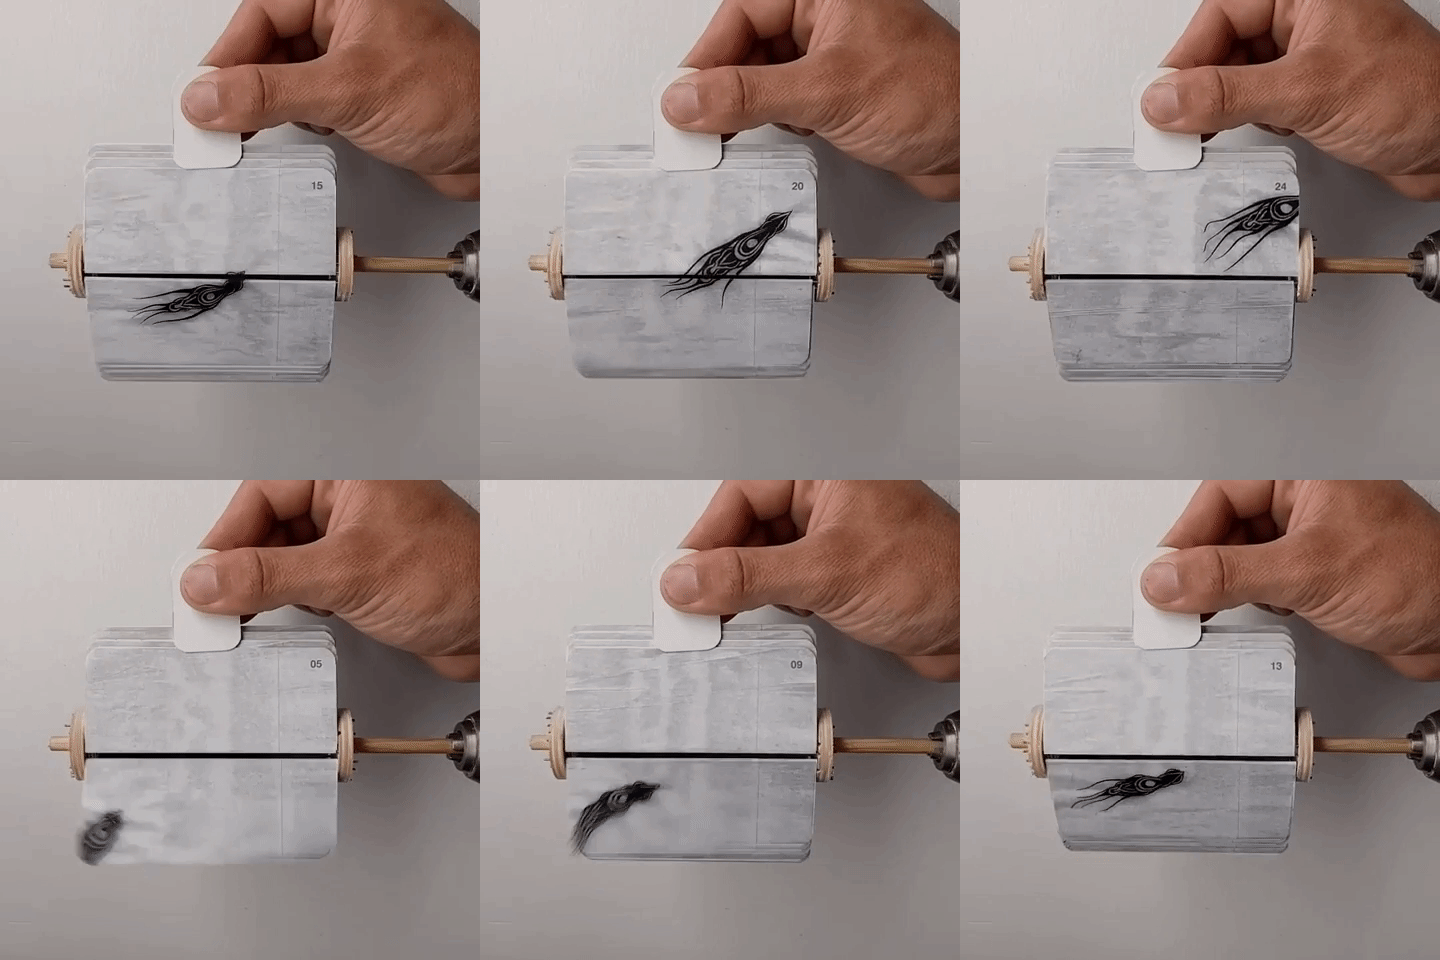
When I saw this piece by Eduardo Salzane I knew I had to make my own animated flip box from scratch. I think the deal was sealed after I went to Maker Faire and saw the Flipbookit booth. They had some beautifully crafted versions of their kits.
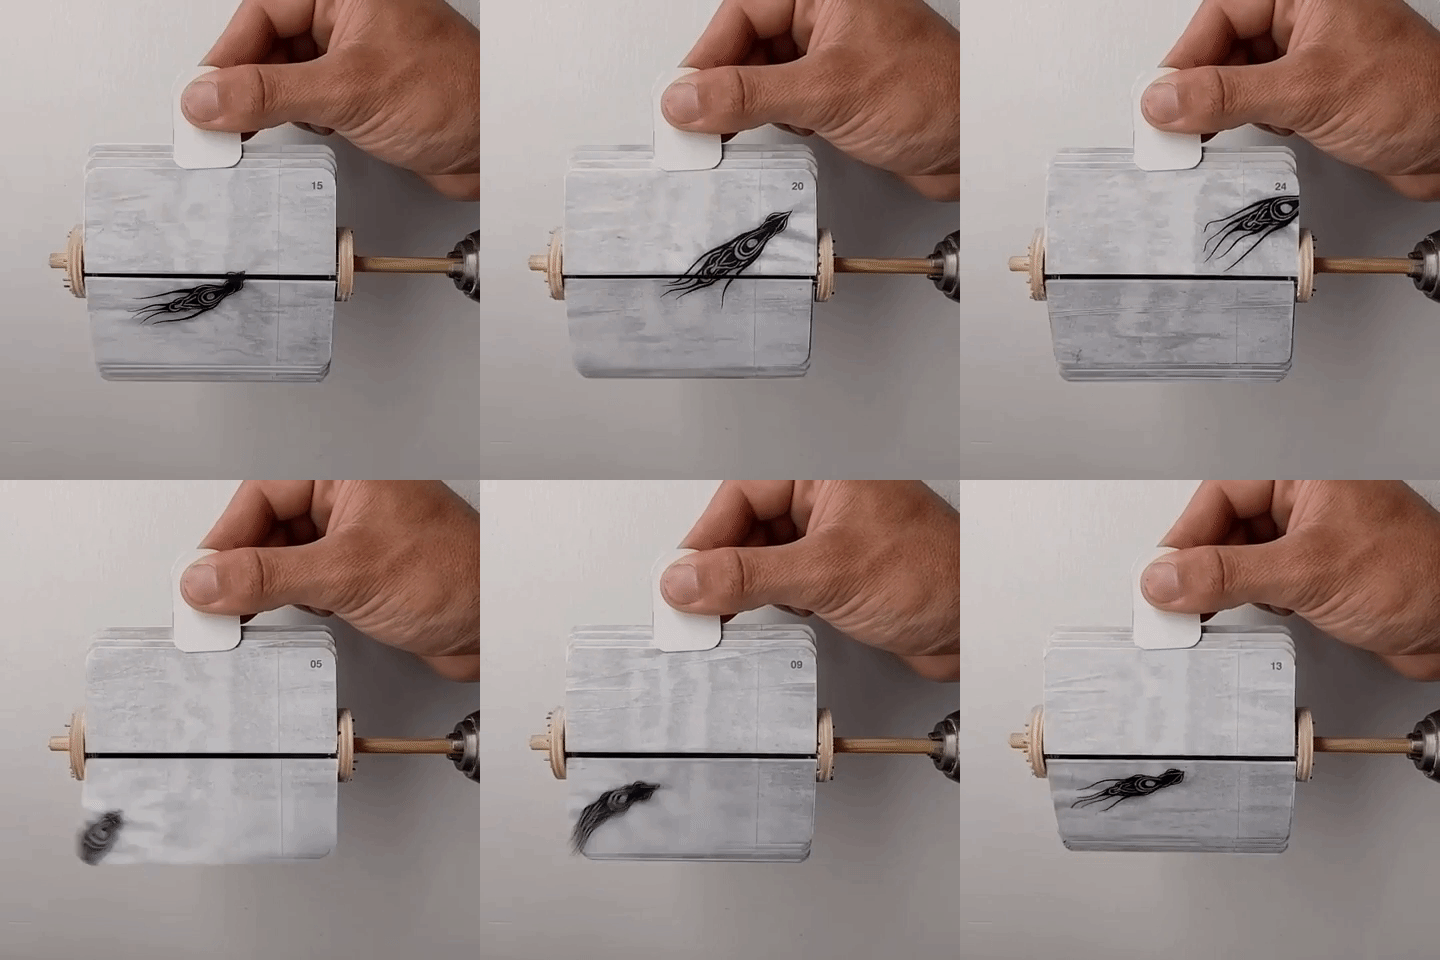
While I was working on this project I started posting work in progress videos of the progress and one of those became very popular. I used a drill to test my animation and that captured people’s imagination. This was the original Instagram post:
After this post, Okat from doodlersanonymous.com contacted me and he wrote a wonderful feature with some additional questions about the project. This was followed by very flattering posts on other websites and Instagram accounts including DesignBoom, BoingBoing, Laughing Squid and Hackaday. There was even a short TV spot on an ABC show. I’m grateful for the attention and the influx of followers, and I received only nice and encouraging comments.
On this post, I will show you the process and I will include some files and resources but I don’t intend it to be a how-to article. That said if you are working on a similar project feel free to get in touch if you have any questions or need additional help. If you want to do something similar but want to avoid the trouble of making everything yourself I’d highly recommend one of these kits.
Animation
My first step was to draw a 24 frame animation. I cut tracing paper in 24 rectangles that were double the size of the final project. The final dimensions are 4″ x 3.34″ so my animation sketch was done on 8″ x 6.64″ rectangles. I wanted something simple so I drew the outline for a single swimming creature (later dubbed a happily swimming squid). After doing it in pencil, I went over it with a black brush-pen. In retrospective, I wish I had used nicer paper because I had a lot of bleedthrough. This was the result:
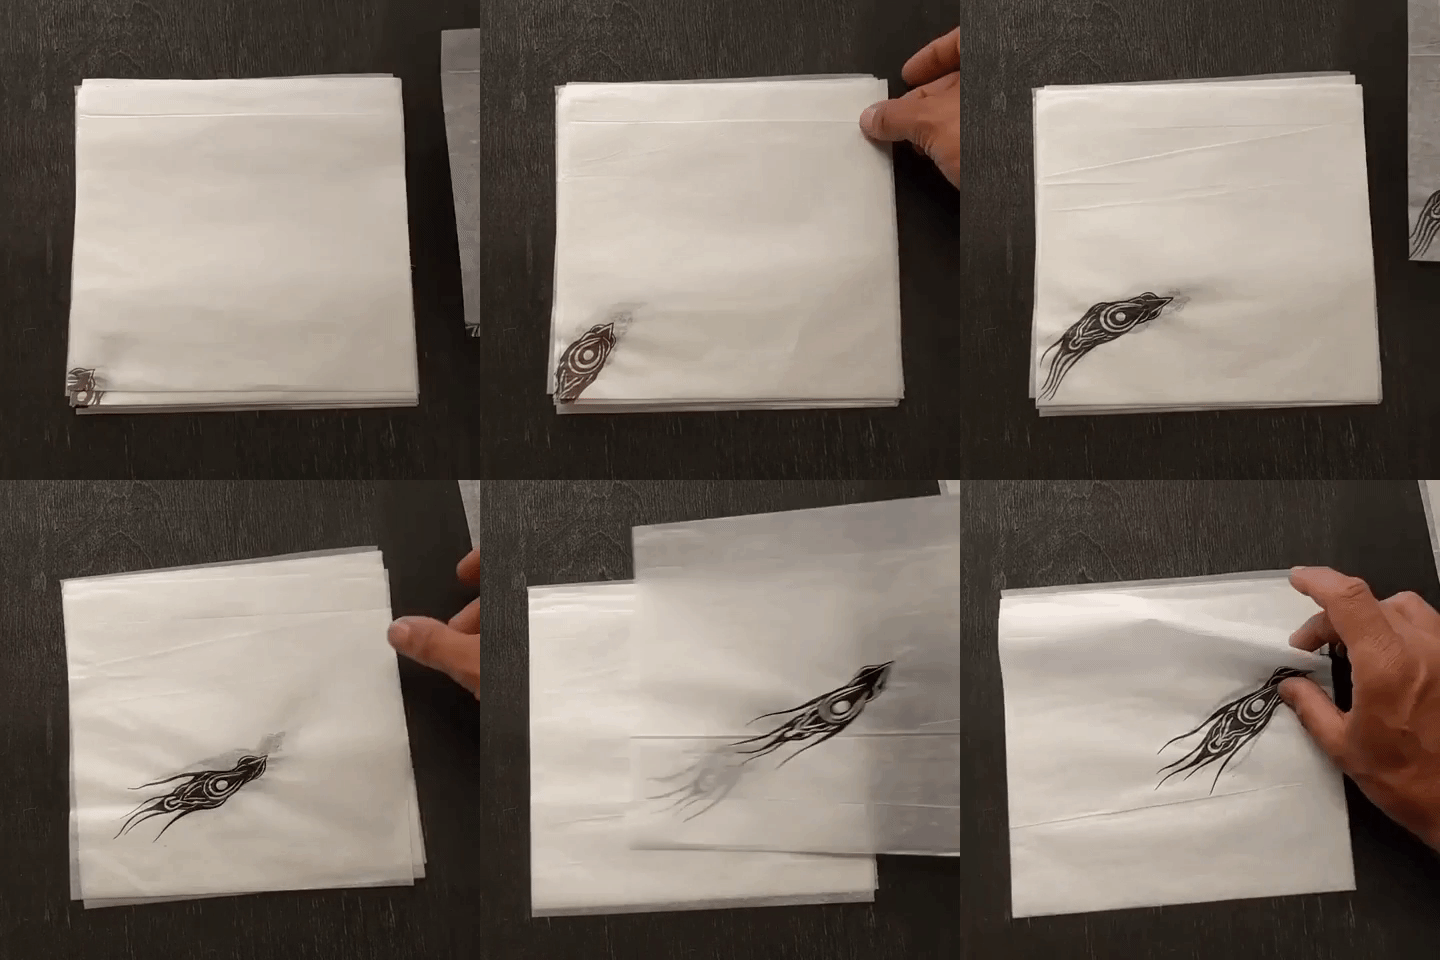
After scanning all the frames and naming them in a sequential order I used the maker tool on the flipbookit website to convert them into printable split frames. I did minimal editing on the images because I thought the wrinkled texture of the paper gave the animation some character.
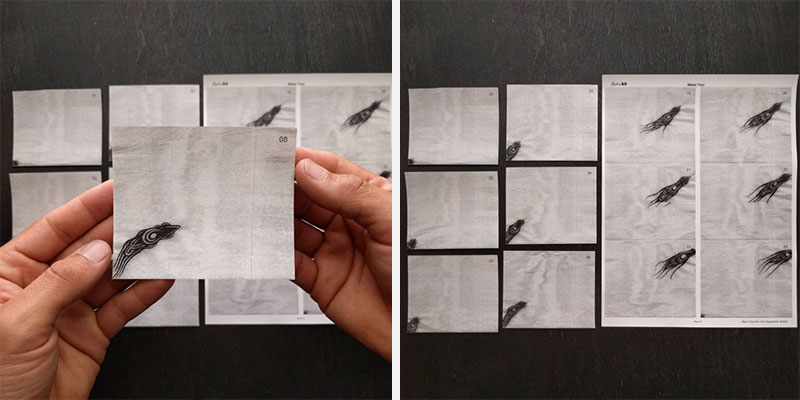
In the following time lapse, you can see the frame assembly. The base for each half-frame is a piece of cardstock (dimensions are 4″ x 1.65″) with a length of 1mm stiff wire taped to it. Then the printed frames are glued this stiff backing. I source my wire from the bead of bicycle tires but almost any wire would do here.
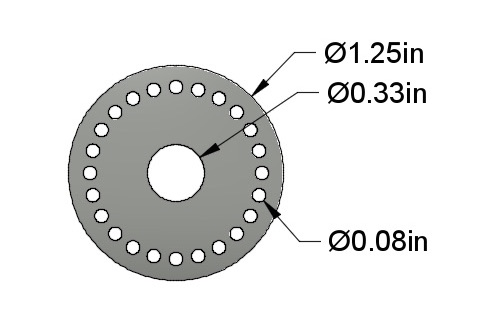
When I had all my frames assembled I drew (using fusion360) and cut a frame holder on my little shapeOko 2 CNC. It’s a simple 1.25″ circle with 24 holes evenly spaced around the edge and a hole sized for a 5/16″ axle. For the axle, I used an inexpensive hardwood dowel from the hardware store. The holes around the perimeter could be smaller but this was the smallest bit I had around.
At this point, I assembled it and had to test it with the drill. Giving birth to an unintentional internet hit:
Box Construction
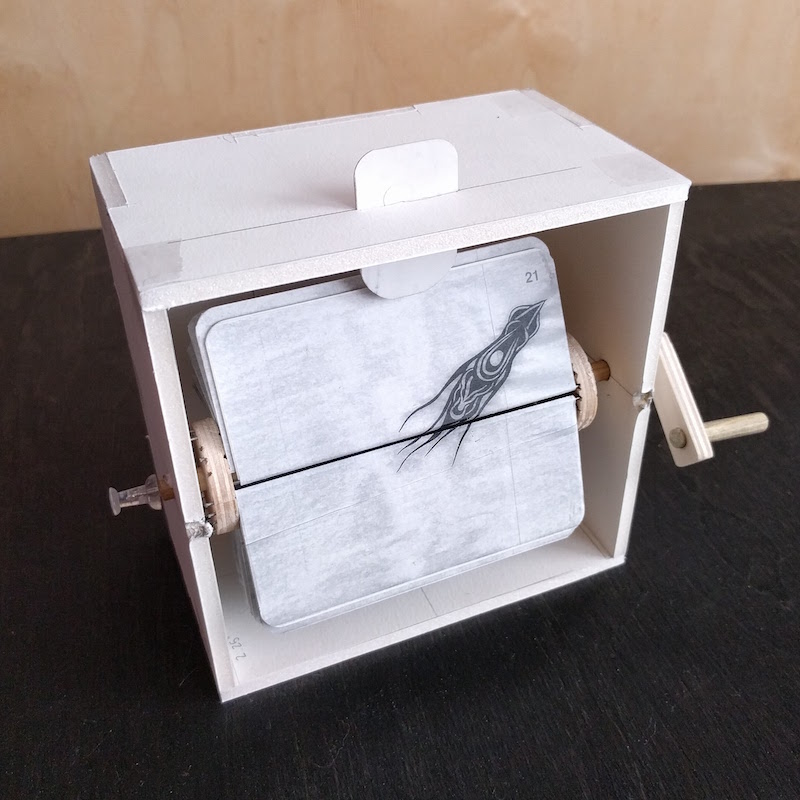
But of course, I had further plans. I wanted to make a box for it so I prototyped one out of foam core around the existing parts. Working with foam core is convenient because it’s easy to cut, inexpensive, and a good surrogate material for 1/4″ plywood. When possible I will make models by hand before jumping on the computer to get the dimensions as close as possible before committing to a design.
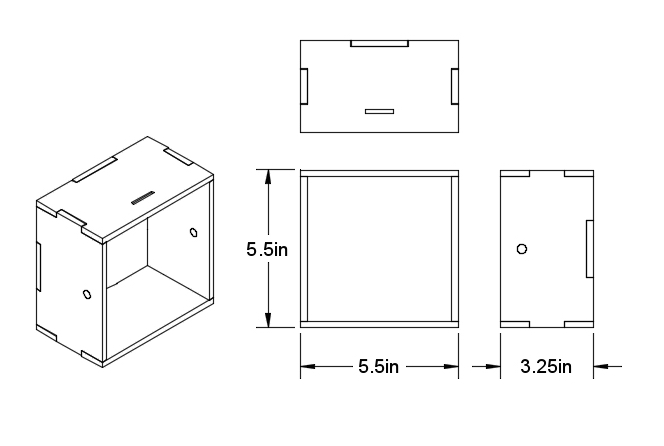
These are the dimensions I decided on: a 5.5″ x 5.5″ x 3.5″ box with added tabs for easy assembly:
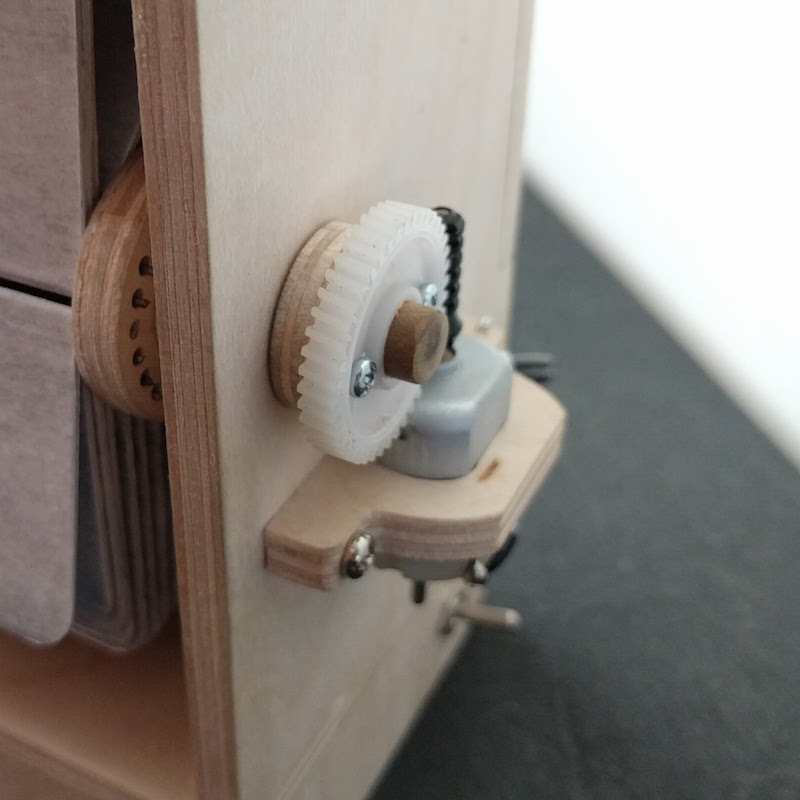
After cutting and re-assembling the box I moved on to adding a motor. I keep a cache of scavenged DC motors and I found one from a CD drive with a convenient worm gear. I made a simple motor holder and attached the matching plastic gear to the axle using a plywood washer and two screws:
My first attempt at calibrating the speed of the motor used an analog PWM motor controller. You can buy them for a few dollars or make your own. This setup worked pretty well so I moved onto mounting the programmable music box. I made a pulley and retrofitted it on the music box handle. Then I added another pulley to the main axle and connected them with a rubber band:
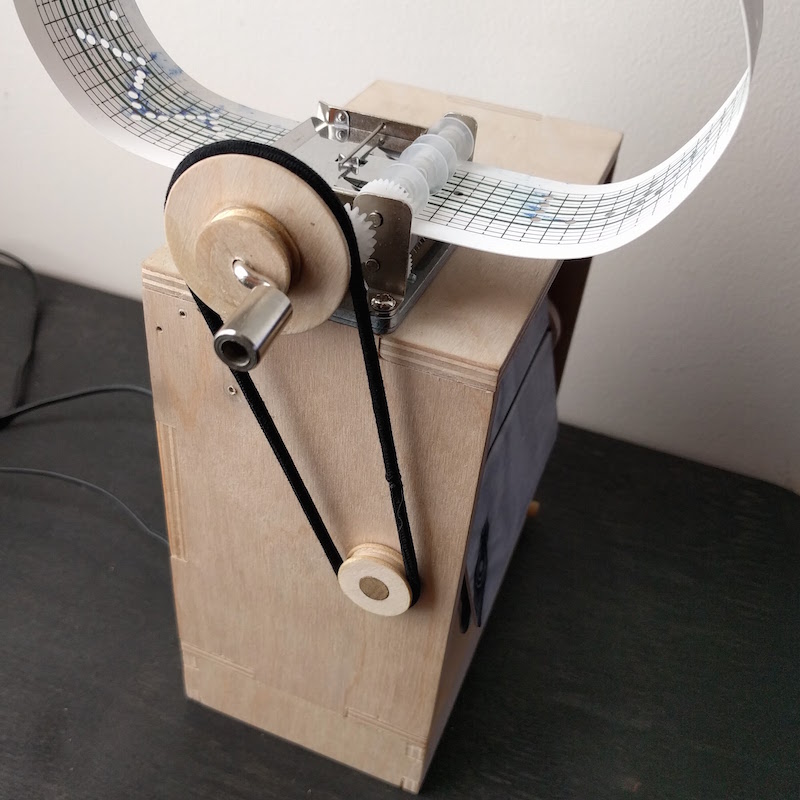
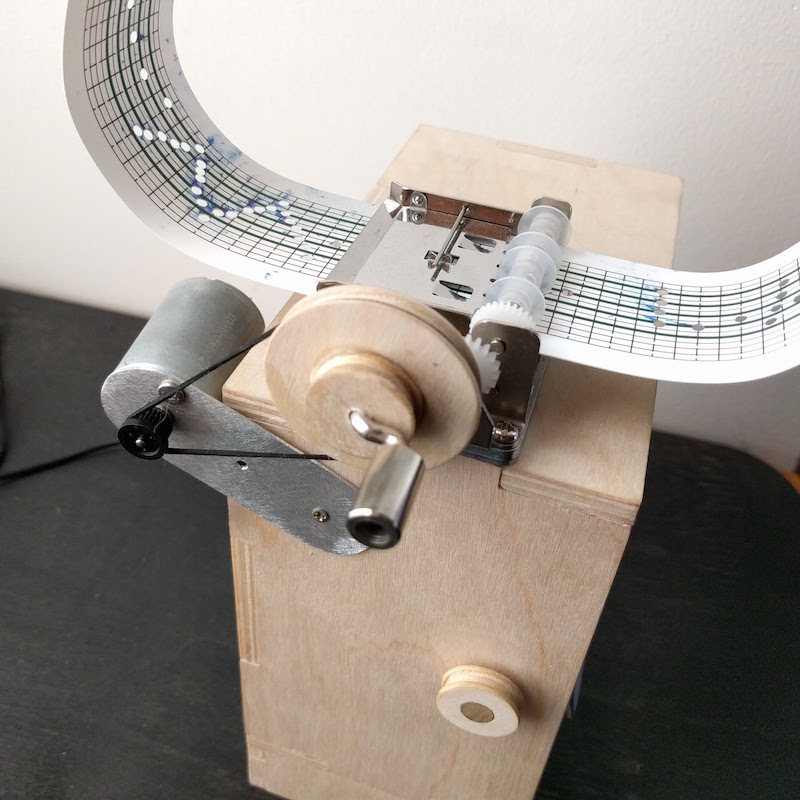
This setup didn't work for two reasons: first, the DC motor I was using didn’t have enough power at low speeds to move everything, and second, it was hard to adjust the speed of the animation and the speed of the music if they were linked. I tried different sized pulleys but I ended up just going with a second motor and a separate speed controller.
I mounted the motor with a handmade aluminum support so it would maintain the tension with its own weight, here is the final configuration:
Electronics
At this point, I moved onto the electronics. I wanted a timer function in addition to the motor speed control so I decided to use an Arduino. I prototyped the circuit using an Arduino UNO and a breadboard, and then I made it into a smaller package by using an Attiny85 instead. It’s funny that I can write this in a few minutes but it actually took me about two days to accomplish.
The individual parts of the project are well documented elsewhere and you can replicate them with a variety of components, here is a summary and links, you can also find these in the comments of my Arduino sketch:
- The speed of each motor is controlled via Pulse Width Modulation, because the microcontroller has a current and voltage limit, the switching is done by a transistor (see the Transistor Motor Control example on the Arduino website).
- A small potentiometer serves as a physical interface to adjust the speed of each motor (see the Reading a potentiometer example).
- There is a single button to start the operation and start the timer, so every time you press the button the animation plays for 1 minute and then stops (see Button Tutorial and Debounce Tutorial).
The specifics of my final circuit are as follows:
- Attiny85 chip running with internal 1 MHZ clock
- Powered by a 12v, 300 mA wall wart
- Power is regulated by an L7805 voltage regulator with two electrolytic capacitors
- 10 uF on the input
- 47 uF on the output
- Each motor control switches 12 v using:
- TIP112 transistor
- 1N4001 Diode
- 270 Ohm resistor
- Trimpots are 10 K ohm outside legs connected to 5v and Ground, middle leg to pins A1 and A2 respectively
- Switch uses a pull-down 10 k resistor connected to ground and the other leg to 5v
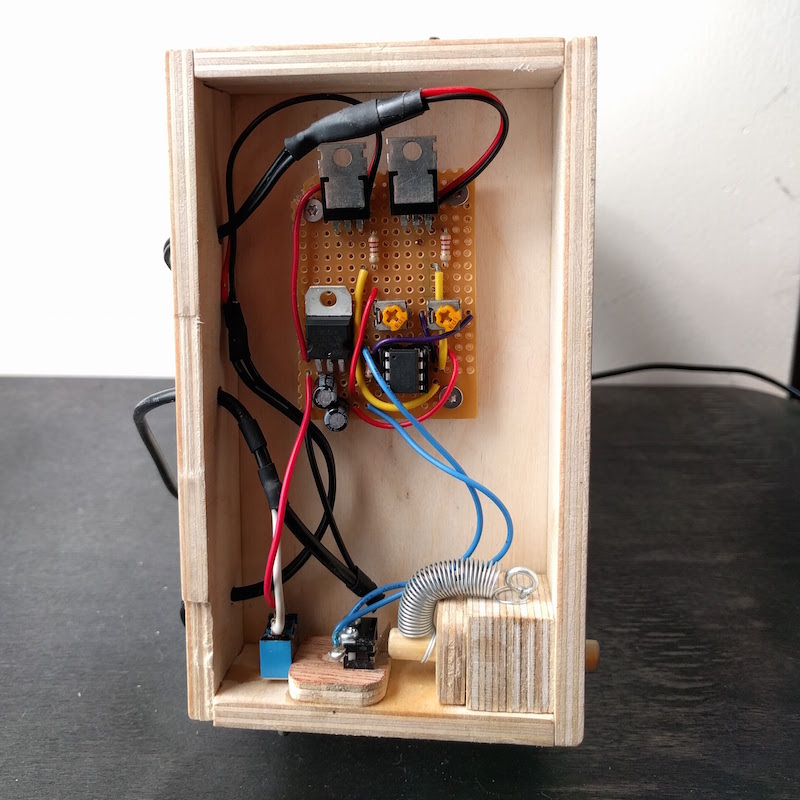
This is what it looks like soldered on perforated board:
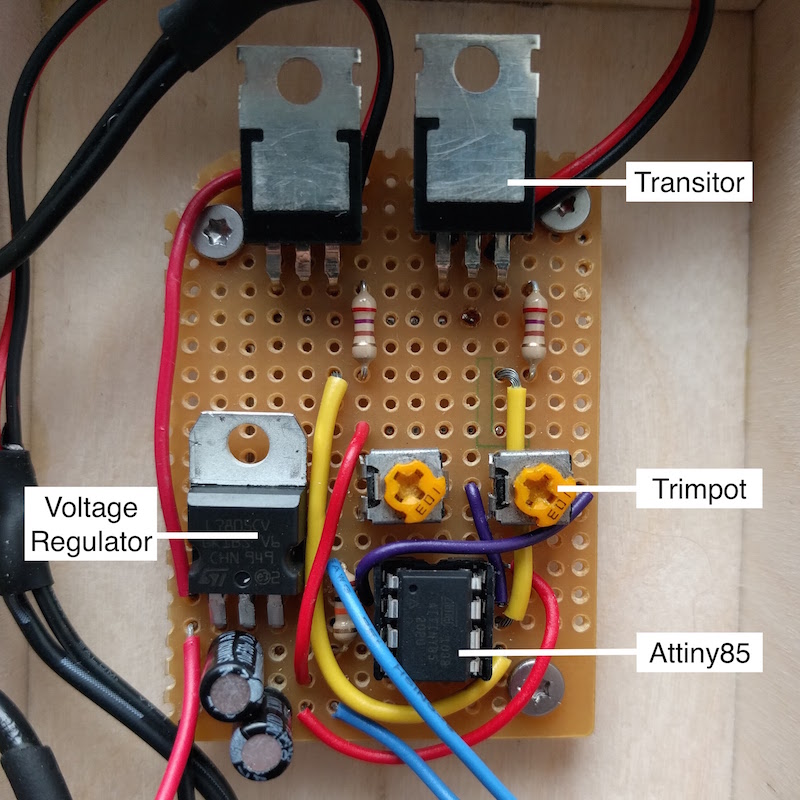
I’ll mention a couple of things that make this setup work: I recommend that you read SparkFun’s tiny AVR guide, here I learned that you need to reference the analog pins in the code as A1, A2, and A3 respectively. Also, there is a way to change the PWM frequency that is helpful because sometimes DC motors will buzz at low speeds, but this affects the millis() and delay() functions so you need to compensate for that if the timing is important in your project, this table explains it.
In order to house the electronics, power switch and button, I added an additional 1″ level to the box. Perhaps if I were to do it again I would build it in from the beginning. I also wanted the pushbutton to have a warm character and a nice texture so I made it out of wood:
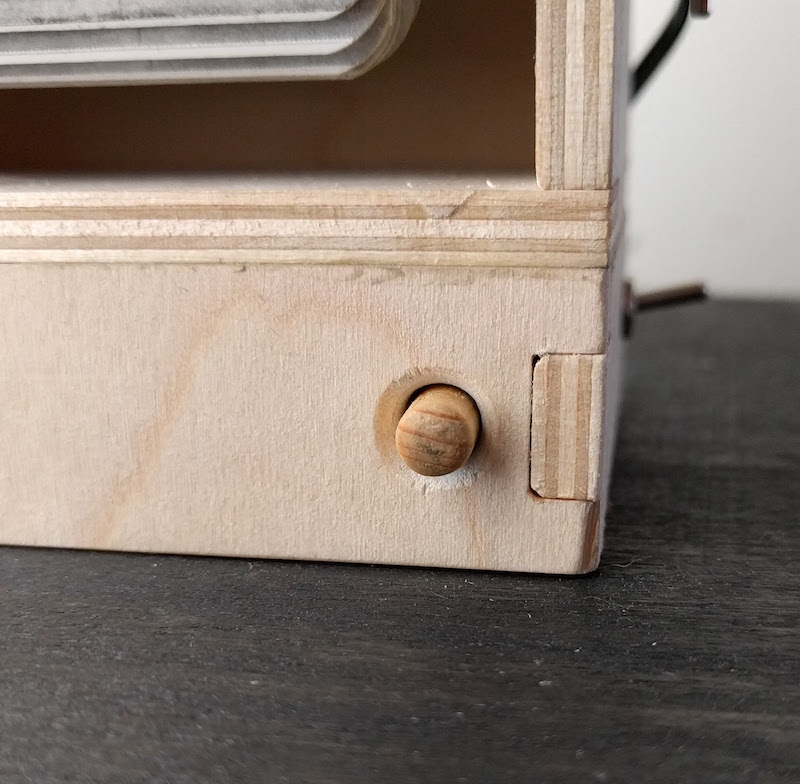
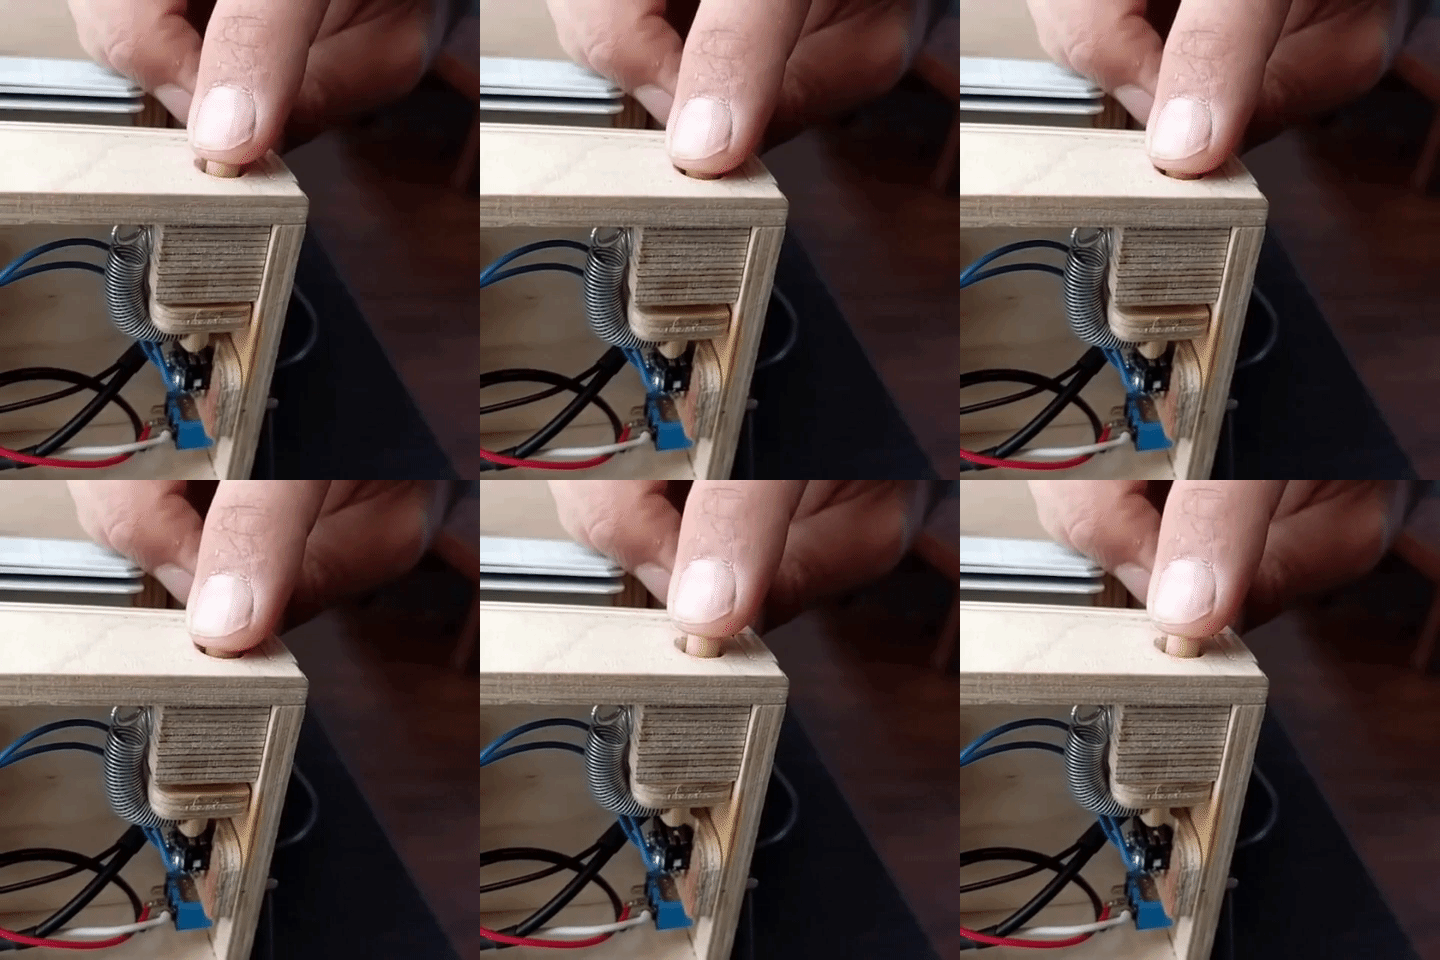
The button is made out of a small dowel going through a block of plywood, it has a small piece of plywood acting as a stopper and a spring to provide the return action. The dowel actuates a small momentary limit switch connected to the Attiny:
Here is the bottom view of the finished project:
My friend Alana composed the music and I think she did a really wonderful job, hear more of her work here.
Here is a of the finished piece, make sure you have your sound on:
Additional Resources:
- Github repository for fabrication files and code. I included most of the files that would help you replicate this project whether you make it by hand, use a CNC router or want to 3D print some of the components.
- This tutorial by Wintergatan was useful for splicing the music box programming strip.
