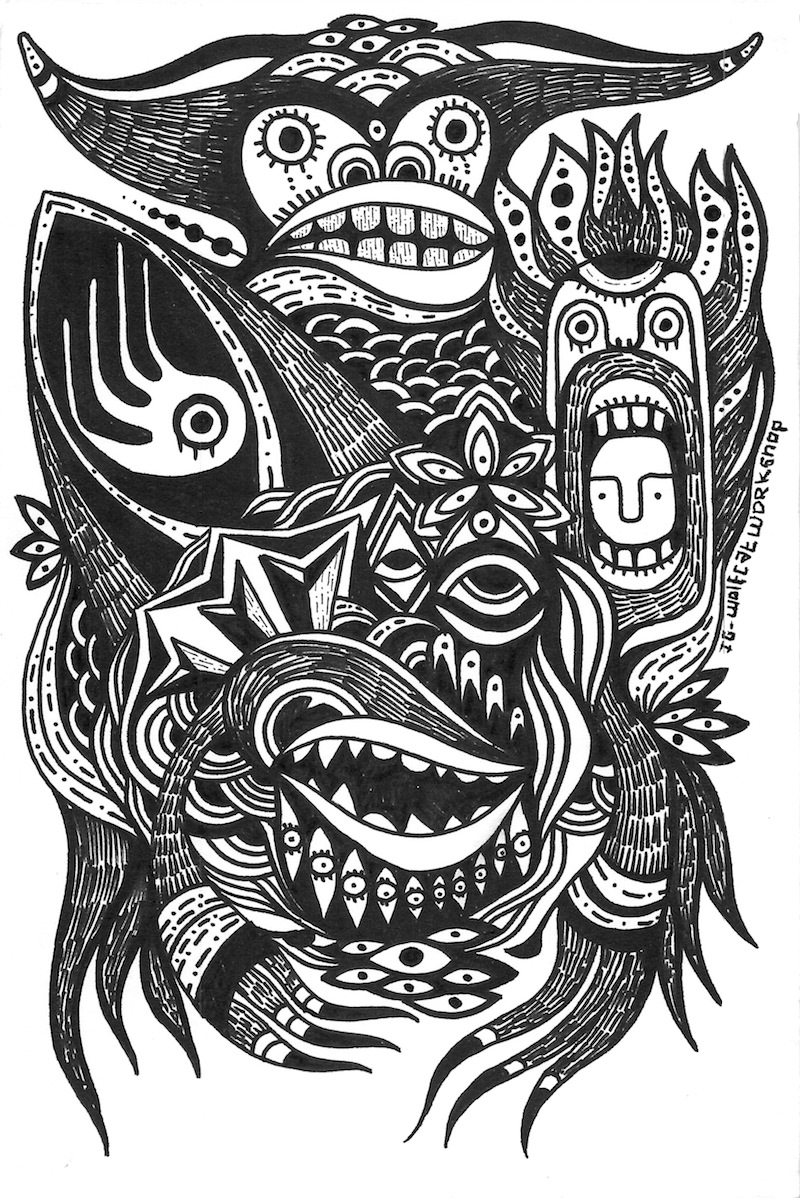
A colorful zine

This post was originally published on my Patreon account, please consider supporting my work by becoming a patron.

After the daily drawing marathon of the 100 day project a few months ago I felt like putting more effort into individual images. So this month I started working in earnest on a new zine. I had some ideas that I wanted to execute but the reality is that most things just take shape as you make them. 

Sometimes I choose some simple guidelines or principles when starting a project, a sort of mini mission statement. The ones I came up with for this particular zine where the following:

  • Be more playful
  • Be surreal
  • Use words
  • Use more color

I admire artwork that looks playful, but this is also a reminder to be less perfectionist. Telling myself to be surreal is about embracing weird things, weird subjects and weird compositions. Using words stands in contrast to the last zine I made which was a wordless story. And use more color is perhaps also a reaction to that last zine, which was entirely black and white. 

Since I’ve been doing a lot of drawing with heavy outlines I had to spend some time experimenting with ways to add more color to these images. Initially things were looking a lot like a coloring book, which is not a bad look but I wanted something different. I found that if mixed monochromatic images with colorful images I could tell myself a story that would also inform the drawings.  Something about monochromatic beings in search of color, perhaps in search of themselves. This character is an example of that:

The one on the left has no outlines, and the one on the right has outlines and  the kind of shading I tend to do with ink drawings. 

The image at the top of the post is also and example of that idea, a colorful alien plant coming out of a monochromatic pot. And with the one below I was thinking about a colorful vortex emerging from the contact between two beings:

You have probably noticed I enjoy drawing patterns, like the tile floor on the above image. or the triangles on the center of this cloud and the shady side of the mountain:

I’m a big fan of decorative patterns but most of the time I prefer drawing them by hand to give them more personality, to give them warmth and an uneven charm. But I think I’ll be breaking that rule with this series. I designed a nice repeat pattern for the background of the plant using digital means and I think it works well. Here is a side by side comparison:

It’s a bit funny to admit I struggle with incorporating digital means to create images when all of these were created using a computer (specifically the app Procreate on an iPad). But this is a big theme for me: I enjoy using computers for making things but I want to resist their aesthetic impositions. Every tool imposes constraints and affects the outcome, a pencil is different from a brush, they are two different ways of thinking and executing images and making marks. And in the same way digital tools are both a way of thinking and doing that influences the outcome, vector images can look square and lifeless, too perfect, but they have practical advantages and even their own charm. 

I’m not a fundamentalist of course, but I feel very aware of this kind of code switching, as I’m both a lover of color and black and white, a lover of real paint and simulated screen paint. 

The plan now is to work on this zine for one or two more months and then have it printed. I feel like I’m pushing some of my own boundaries and creating some satisfying images. I’ll be posting some shorter more frequent updates as I finish more pages. 

As always thank you so much for your support, without it this kind of slower, deeper work would be much harder, plus it’s nice to know I can finance the printing using your generous contributions.  I’ll leave you with one last finished page:

Like the River


This is a short, wordless, comic about loss. My original intention was to publish it as a printed zine only but I decided to share it online as well. I hope it reads well on screen as I didn’t draw it in square format. I drew it one page at a time without a general plan, I think I was trying to put a feeling into images.

The feeling of being grateful for what is here now, but will be gone one day. I realize it’s a bit much to think about death these days but the last few panels seem to have positive take on it, as in letting go, and perhaps returning to the source, whatever that is.

You can purchase affordable printed copies of this zine on my etsy shop. Thank you for your support!

A new high contrast baby mobile

A previous post described my process for making a plywood mobile. I’ve since added a new tool and some materials to my process so I thought it would be relevant to document this latest build.

This mobile was commissioned by a close friend (disclaimer, I struggle a lot with commissions so I don’t take them easily). I started by drawing several sketches by hand and then putting them into a digital document as a mockup. I made several but I’ll show you only the one my friend chose:

mobile mockup

The fish are a salmon and a flounder since I wanted to have some species from California. I’m particularly proud of the salmon drawing. At this point I converted the images to vector drawings and started cutting them on the laser cutter. I used 1/8″ birch plywood. Every piece was cut in two parts that were mirror opposites. The plywood had masking tape which allowed me to precisely cut the mask for the shapes I had drawn.

In order to glue the pieces, I made registration holes that fit a paper clip. Conveniently I could later use the registration holes for hanging the pieces. The holes were 0.03″ in diameter and 0.03″ apart.

I pre-treated one side of the plywood with spray-on shellac and a light sanding before applying the masking tape. I found that a light coat of shellac allows me to remove the masking tape without raising the grain and it’s a good surface for painting.

two salmon pieces coming out of the laser cutter

Flounder ready to be glued with the paper clips aligning the two pieces.

Never too many clamps when gluing. I used plain wood glue for this part.

The fun thing about scoring the masking tape is that I don’t have to re-trace the drawings and I get to paint one of the colors with a blunt tool. For the black, I did two coats of Montana water-based acrylic paint, and for white two or three coats of Golden high flow acrylic. I like high flow acrylic because it can be applied with a brush or a quill for finer detail.

acrylic paint
acrylic paint

Weeding out the mask to uncover the black sections.

Ready to paint

It’s nice to wear gloves for this step.

Peeling the mask for the white sections.

There was a little bit of bleed.

The bleed wasn’t too much of a problem on this project because I had a two-color palette but, incidentally I just saw this video where they suggest applying a clear coat before painting to clog the edges of the mask. I have to try that next time. On the last picture, I’m applying paint with a small brush and a quill for small areas.

Ready to hang!

I didn’t do all the pieces at once because I wasn’t sure the proportions were right on the mockup. I worked from the bottom up and at some point, I even re-cut the pieces that go on the flounder. The process could be more efficient but at the end, I was happy with the results.

For the lines, I like using bead stringing wire. It’s flexible, strong, and it looks really clean. The one downside is that you need to purchase crimp tubes and a crimping tool. I think you could skip the crimping tool and use regular pliers if you are in a pinch. The crimping tool just gives you a slightly cleaner and more consistent look.

In order to make the pieces face down for the baby to see, I used this triangular arrangement:


Perhaps the most challenging part of this project was taking pictures of the finished product. It’s really hard to convey the experience in still images. Here are my attempts, thanks for reading!


Experiments with Air-Dry Clay

When I saw Shaun Tan’s “The Singing bones” I fell in love with his simple and evocative sculptures.  I was delighted to find out he used inexpensive materials and techniques so I set out to experiment on my own. In the afterword of The Singing Bones Shawn explains:

“The main materials I’ve used are papier-mache and air-drying clay, carved back and painted with acrylics, oxidized metal powder, wax and shoe polish. The resistance of clay in particular at a small scale encourages simplicity, especially where the key tools are blunt fingers and thumbs: Faces and gestures are abbreviated, just like characters in the tales themselves. “

He also wrote a blog post about his process. I remember playing a lot with modeling clay when I was a child. I created a lot of creatures and strange faces and I think I wanted to experience that aimless sense of creation again. I bought some relatively inexpensive Crayola brand air-dry clay at a store near me and set out to feel the material.

My first tub of air-dry clay

It’s nice to work with when wet and it accepts the common clay techniques and tools. But my favorite part is carving it when it has dried a little bit (usually a few hours depending on your climate).  A made a short video to demonstrate:


The tools I’ve been using besides my fingers are a couple of carving gouges, an X-Acto knife with a #22 blade (the curved edge is nice for scraping), a paper clip and a bamboo skewer:

Some of my carving Tools

Size wise I’ve stayed below 1.5″ x 1.5″ roughly. I think this type of clay can support bigger sizes especially if you make a wire structure but it’s nice to have limitations. Here are some of the characters I’ve made so far, ruler and coins for scale:


I think I would enjoy making more elaborate sets for these characters but so far I’ve kept it simple. Sometimes I take pictures on top of my sketchbooks or inside a lightbox I made out of foam core and tracing paper. Total cost (without the lamps) was less than $2, there are a lot of tutorials out there for building your own, this Instructable would be a good start.

DIY lightbox is about 12″x12″x12″

Right now I’m more interested in the shapes than in the stories of each character. Although I hope some of the pictures will suggest a story by themselves. Here is a collection of the ones I’ve posted so far on my Instagram account. I think it’s a fun and approachable material, I suggest you give it a try.


One year of Melt-thology

I have a ritual with my friend Joe Linton. On the third Tuesday of (almost) every month we ride our bikes to Meltdown comics and draw together at the Melt-thology comix jam. A big part of the appeal for me is to hang out with Joe and talk about comics and life, but it is also a good opportunity to draw in a different environment. Occasionally Joe will bring his daughter Maeve (aka Super Maeve) and it’s great to watch them collaborate on a comic.

It’s a very friendly set up and at the end the artwork is collected with $3 for printing costs and you get a zine the following month with a collection of everyone’s contributions. It goes from 7:00 pm to 9:30 pm which sounds like a lot of time to complete one page but I’ve been surprised more than once, this stuff takes time.

If you are in the L.A area I would encourage you to go. The venue is the legendary Meltdown Comics and it is a fun way to meet other artists and share some of your work. Find more info on the Melt-thology facebook page or Instagram.

My melt-thology zine collection so far.

I feel like my submissions have been a mixed bag. Sometimes I try to do a mini-comic and sometimes I go for a simple illustration. I like the two hour restriction because it forces me to finish something quick, so I concentrate more on the overall effect rather than getting caught in the details. Here is a collection of all the ones I’ve submitted so far in order of appearance, also notice I got to do the cover for #19.

melt-thology #13

melt-thology #16

melt-thology #17

melt-thology #18

melt-thology #19

melt-thology #20

melt-thology #21

melt-thology #22

melt-thology #23

melt-thology #24

melt-thology #25

melt-thology #26

melt-thology #27

melt-thology #29

Warm Heart Automata

A little story about how not to steal like an artist first. Sometimes I seek inspiration in social media. One day I found this awesome illustration by Instagram user @you_just_illusion and decided to use it as the base for this drawing. I sincerely though I had made it different enough and imbued it with my own style but that’s not how he felt and he let me know in a polite direct message. I apologized and we agreed that a shout out to his work would be enough atonement.

I think sometimes there is a fine line between inspiration and copying and it seems like I crossed the line in this case. I wasn’t trying to be malicious but sometimes this happens. Originality is not very important to me. I subscribe to the “Everything is a remix” idea. And almost everything I do came out from somewhere else. Sometimes the influences get lost, mixed with the others. And sometimes you make the wrong judgement about how far you actually mixed something. In this case no one got seriously hurt and we had a good interaction. And I’m also satisfied with how this piece turned out.

The first version I drew was for a zine project I was working on, which you can see in the background here:

warm_hear_start_wolfcatworkshop

I’m on a quest to unite my visual output with my maker spirit. Making drawings that move seems like a great way to do that. I started by cutting the outlines out of 1/4 in plywood and attaching the flames to a couple of dowels.

My initial idea was a simple crank and some wavy motion but I wasn’t entirely sure about how the mechanism was going to work, so I made a prototype out of scrap wood and wire:

And here is what the final version looks like with the two cranks:

After I had the mechanism figured out I moved onto painting. I started with a few coats of white acrylic ink. I sanded that with 600 grit sandpaper to get a nice even surface and applied a coat of workable fixative. The fixative helps with bleeding. I applied the black ink with a brush and and quill for the fine details.

warm_heart_progressI like how you can still see the grain of the wood on the white areas.

Before the final assembly I coated the main surface of the box with superglue. It acts as a hard clean finish. The other parts were coated with a matte finish. The moving sections were lubricated with bee’s wax. I made the handle out of some ebony scavenged from the keys of and old piano a friend found in the street.

One final detail is the wall mount. This system with two matching pieces of wood cut at a 45 degree angle is called a “french cleat”. The screw on the side is for added stability when using the crank.


Artist Trading Cards for Reddit

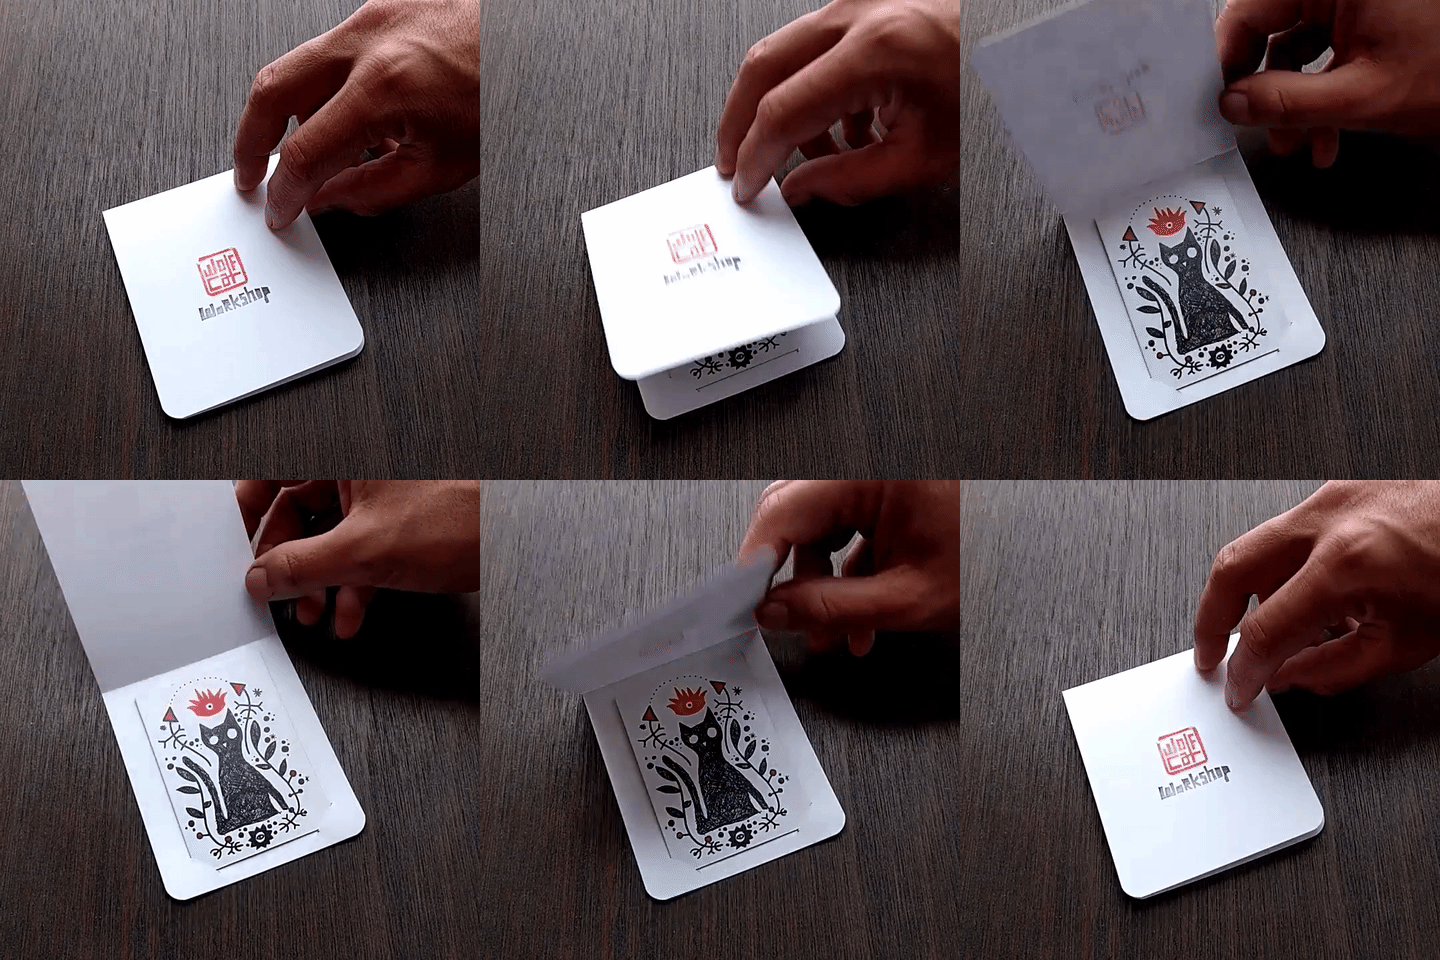
I signed up for an artist trading card exchange on Reddit (at /r/ArtistSpeakEasy if you are curious). I like artist trading cards (ATC’s) because you can finish them fast and move on. Little 2.5″ by 3.5″ experiments. I’ve never actually traded them but I still like the idea.

For this batch I made a little card holder which you can see in action here.

I love receiving things on the mail and I wanted to create a nice experience for those who got one of these cards.

maker advice

make with reckless abandonJimmy Diresta is a wonderful maker and youtuber. In a response to one of his twitter followers he said:

Just make shit with reckless abandon. Money will come when your 50. But you will always have fun!

-Jimmy Diresta

I really liked the idea so I made this illustration one afternoon.

garden gnome

This was my submission for the Doodlers Anonymous showcase sponsored by Tom Bihn.  Go over there and vote for it, the garden gnome will be most grateful.

The story behind it:

“I have been reading a Hundertwasser text called the garden gnome where he says the garden gnome is a reminder of how we used to talk to the grass and the birds and we no longer know how. The travel theme made me think about the film Amelie and how she convinces her father to travel the world by stealing his garden gnome and having a friend send postcards with the gnome around the world. I dream of traveling around speaking to the birds and the grass and the people and I’d love to send my friends postcards with a funny -yet deep- character that goes around clothed with whatever he finds in his journey.“